
on

Wiring your trailer can seem like a daunting task, but with the right guidance, it becomes manageable for anyone. 

In this guide, we’ll provide step-by-step instructions on wiring and installing a 7-pin trailer plug, ensuring your towing setup is safe and functional.

Why Use a 7-Pin Trailer Plug?

Adding a 7-pin trailer plug to your vehicle serves various purposes, from accommodating trailer brakes to upgrading from a 4-pole setup. It’s crucial to assess your requirements before choosing the right setup. 

The 7-pin plug offers standard connections for ground, running lamps, turn signals, electric brakes, backup lamps, and a 12-volt line, catering to diverse towing needs.

Choosing the Right Kit

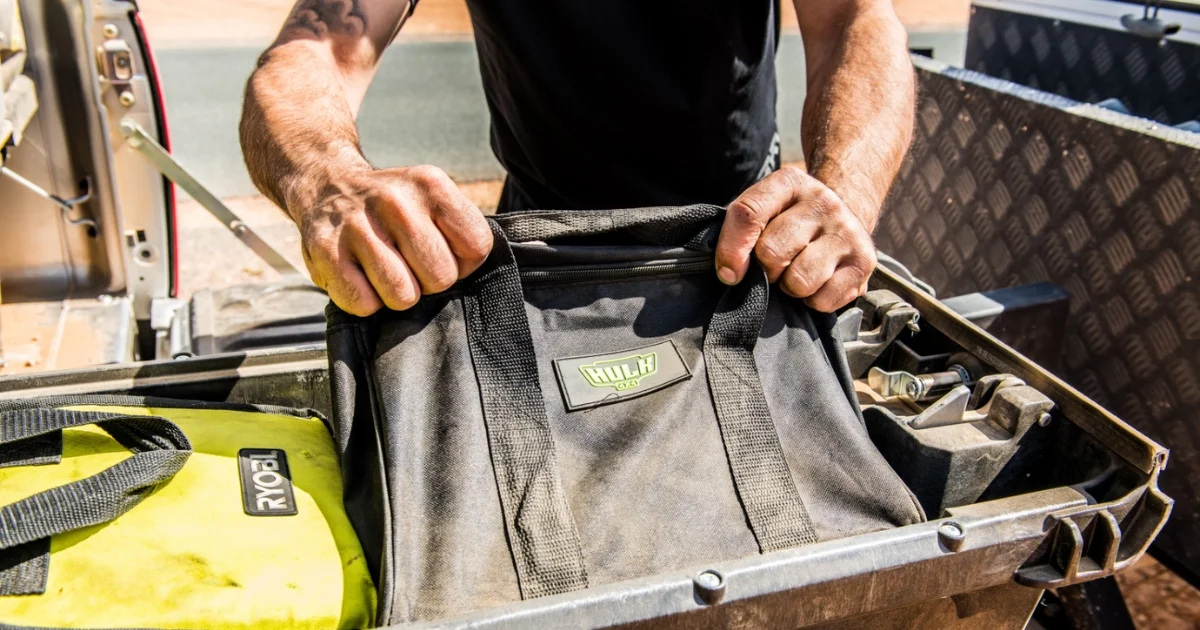
Man grabbing a black kit bag from a truck bed

Selecting the appropriate 7-way kit depends on your specific situation. If you’re simply adding a plug to a pre-existing 4-pole setup, a kit with a 4-pole harness may suffice. 

However, if you’re starting from scratch, opt for a kit that includes all the necessary wires and connectors for a complete installation. You might even require a trailer plug adapter to properly fit your vehicle’s needs – if so, we’ve got you covered.

Related: In need of a 12-pin trailer plug instead? Check out our quick 12-pin trailer plug guide for everything you need to know.

The 7-Pin Trailer Plug Wiring Process

Right, let’s get into it! The wiring process for your trailer plug takes a little fine tuning, but follow these super simple steps and you’ll be raring to go in no time.

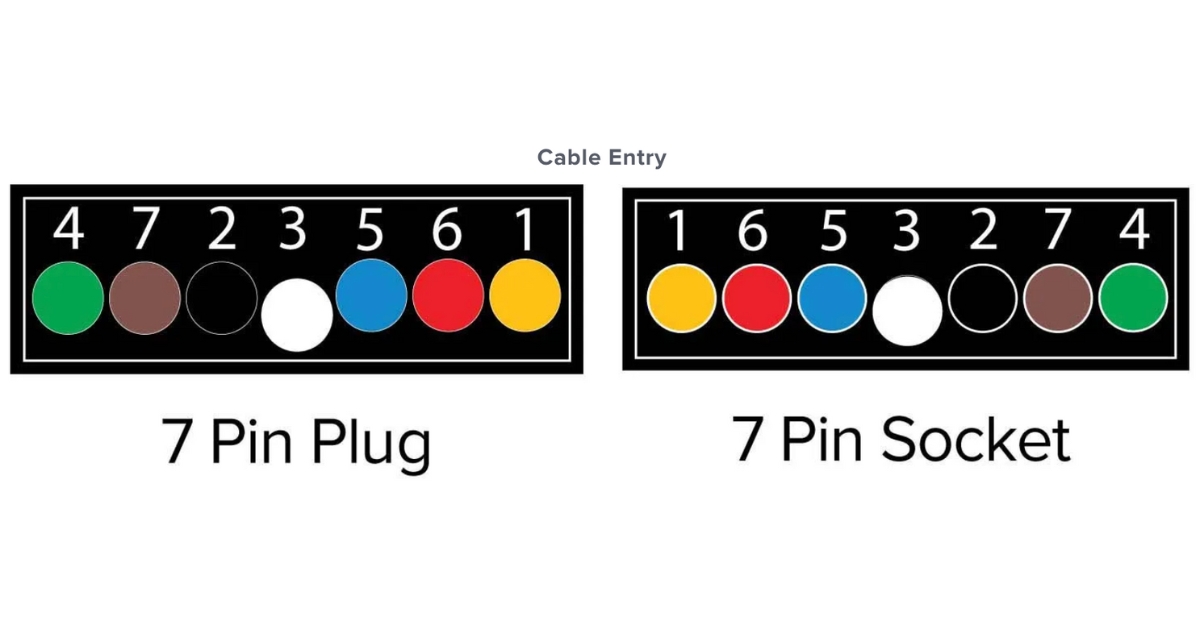
7-pin plug cable entry colour diagram

Credit: Narva

1. Wire Connections

Installing a 7-pin plug involves understanding signal connections from the front to the rear wiring harness of your vehicle. 

Begin by testing and identifying each wire’s function, noting any variations in colour coding between different harnesses. 

Use heat shrink butt connectors for secure connections, ensuring durability and protection against corrosion and moisture.

2. Testing and Validation

After making all connections, conduct a thorough test of each function to ensure proper installation. 

Verify ground, running lamps, turn signals, electric brakes, backup lamps, and the 12-volt line for functionality. Address any issues promptly to ensure a safe towing experience.

3. Final Touches

Once all connections are validated, wrap exposed wires with electrical tape and use a wire loom for added protection. Neatly organise and secure the wiring to prevent damage during use. 

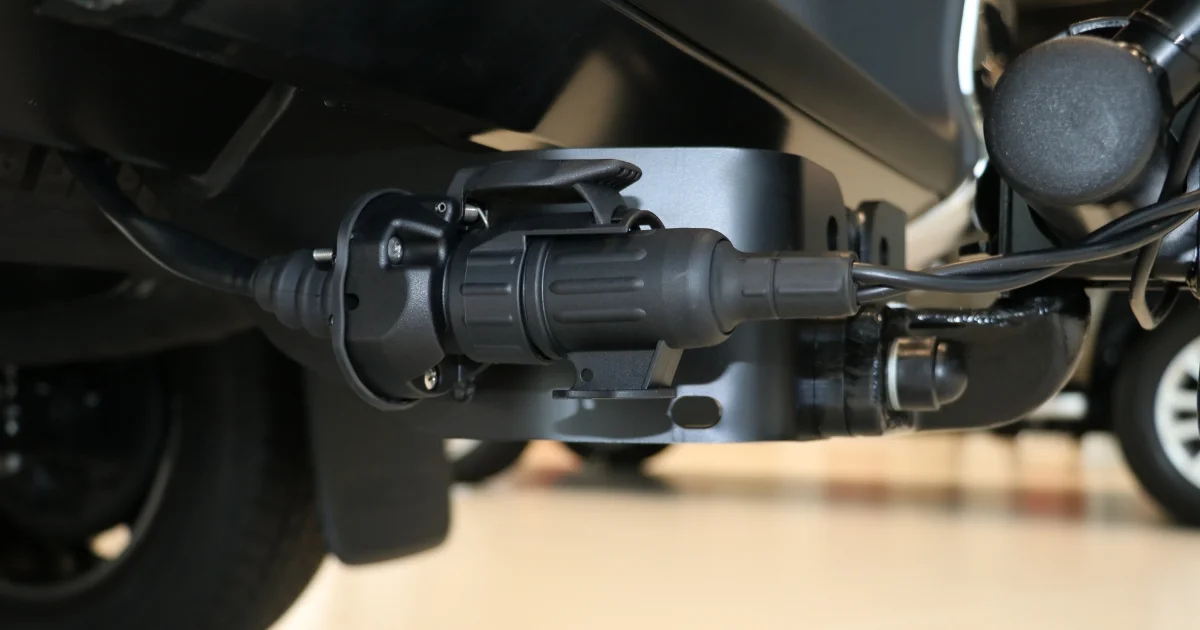
Finally, mount the 7-way connector on the bumper, ensuring it is securely attached and easily accessible for future use.

Easy Wiring for Functional Towing

Wiring and installing a 7-pin trailer plug may seem complex, but with the right approach, it becomes a manageable task for any enthusiast. 

By understanding your requirements, choosing the right kit, and following the wiring process meticulously, you can ensure a safe and functional towing setup for all your adventures on the road.

Need a touch more advice? At Ark, we’re always keen to help with your trailer and 4×4 needs. Get in touch with us about wiring or product inquiries and our friendly team will be happy to help.
Looking to elevate your towing experience even further? If your gear supports a 12-pin trailer plug, check out our revolutionary Smart Connector and discover the future of trailer plug technology!

Categories: News

on

Welcome to the future of trailer plug technology with Ark’s groundbreaking Smart Connector. As we delve into the realm of towing innovations, let’s explore how traditional trailer plugs compare with our cutting-edge Smart Connector and envision the exciting trends shaping the future of trailer plug wiring.

Understanding Traditional Trailer Plugs

Traditional trailer plugs serve as the backbone of electrical connectivity between vehicles and trailers, providing essential functionality for safe towing operations. 

These plugs, often characterised by their standardised pin configurations, facilitate the transmission of signals for crucial lighting functions, including brake lights, turn signals, and reverse lights.

However, despite their widespread use and reliability, traditional trailer plugs have some pretty big limitations. Their simplistic design and functionality restrict them to basic electrical connections, lacking the sophisticated intelligence and advanced features found in modern solutions like the Ark Smart Connector.

While traditional plugs effectively enable basic lighting operations, they fall short in providing real-time diagnostics, remote monitoring capabilities, and seamless integration with digital devices. 

Without automated systems for detecting faults or malfunctions in trailer lighting systems, users are often left to conduct manual inspections, leading to potential safety risks and inconvenience.

Enter: The Ark Smart Connector, aka your solution to these shortcomings in trailer plug technology and the key to a new world of digital integration, enhanced safety, and innovation in towing.

Introducing the Smart Connector

So, what’s the future of trailer plugs? Simple: The Ark Smart Connector, which is quickly revolutionising towing safety and convenience. 

Our innovative Smart Connector initiates an automatic diagnostic as soon as the trailer plug is engaged, activating trailer lights within 20 seconds for seamless inspection. 

Equipped with Bluetooth® technology, it effortlessly pairs with IOS or Android devices, allowing users to conduct checks at their convenience. The app’s additional feature enables vehicle cable checks, vital for identifying lighting circuit issues. 

Featuring Ark’s renowned AHI7 universal towbar wiring harness functionality, the Smart Connector ensures compatibility with modern vehicle ECUs. With identical plugs as the AHI7 wiring harness, retrofitting the Smart Connector becomes a hassle-free process for vehicles already equipped with an AHI7. 

Smart Connectors vs. Traditional Trailer Plugs

Unlike traditional plugs, the Smart Connector boasts automatic diagnostic capabilities, providing real-time feedback on trailer lighting systems. 

While automatic light testing is available in some new vehicles, most don’t have this important safety function – the Smart Connector allows you to easily upgrade your towing experience on your current vehicle no matter its capabilities.

With seamless integration of Bluetooth® technology, users also gain unprecedented control and monitoring capabilities via their IOS or Android devices. Simply check your screen for light changes and get instant feedback on potential issues.

Gone are the days of manual checks and guesswork – the Smart Connector sets a new standard for convenience and safety in towing.

Related: Must-Have 4×4 Vehicle Recovery Parts

How to Install the Smart Connector

From mounting the Smart Connector with precision to wiring it seamlessly into your vehicle’s electrical system, we’ve got you covered every step of the way.  With a comprehensive installation guide included with every unit, below you’ll find a brief rundown of the process to streamline things. 

Installing electrical components to your vehicle can feel a touch overwhelming, so we’ve ensured the process is as simple as possible – although we do recommend having a professional look over your work to ensure it’s safe. 

  1. Mounting the Smart Connector:
    • Your Smart Connector comes with different mounts, including the vehicle mounting bracket and the Anderson style mounting bracket.
    • The Anderson Style Connector mounting bracket can be fixed to either the left or right side of the smart connector mounting bracket, depending on your vehicle’s space availability.
  2. Understanding the Wiring:
    • The Smart Connector uses AU pin industry standard wiring for trailer electrics, along with an extra 5-pin Auxiliary output.
    • Each Smart Connector comes with a colour-coded wiring chart to make installation a breeze. You’ll need to spend your time familiarising yourself with this as it is key to your installation.
  3. Wiring the Smart Connector:
    • The Smart Connector is a universal fit vehicle connector and needs to be connected to your vehicle’s cable system.
      1. Locate the light function cables near the rear tail lights of your vehicle. Identify the different Stop, Tail, Left & Right indicator light functions and attach the T-tap In-line Connectors over each identified cable.
      2. Crimp the Insulated Spade Connector on the Stop, Tail, Left & Right Indicator cable of the Vehicle Harness Cable, referring to the colours in your wiring table.
      3. Crimp a Ring Terminal on the Negative (Earth) cable of the Vehicle Harness Cable, referring to the colours in the wiring table, and connect it to a common ground.
      4. Crimp a Bullet Connector Insulated on the PINK 12V + of the Vehicle Harness Cable. Join this to the female bullet connector of the Fuse Holder. Crimp a Ring Terminal to the other side of the fuse holder and attach it to the vehicle battery-positive terminal.
      5. The E-Brake is a BLUE stand-alone cable in the wiring loom. Connect it to the brake controller of the vehicle if it’s fitted.
  4. Wiring the Anderson Style Connector:
    • Connect your Anderson Style Connector to your battery, using a minimum of 50A 6mm Automotive Cable.
    • Make sure to fit a 50A Circuit breaker/fuse just before the vehicle battery positive terminal for safety.
  5. Set Up The App
    • Once your wiring is complete, it’s time to install and sync your Smart Connector with the Ark Smart Hub App
    • Pairing the device is as simple as scanning for Bluetooth devices!

Once paired we recommend running the Vehicle Cable to Smart Connector Check function to ensure all cables are wired and functioning properly. This function allows you to see the real-time signal status of each of the cable connections made from the vehicle cable to your smart connector. 

Wiring a Trailer Plug and Harness Installation

Close-up of wires for a trailer plug

Credit: The RV Geeks

For those looking to enhance their towing capabilities, understanding how to wire a trailer plug and install a wiring harness is essential. Here are some key points to consider:

Trailer Plug Wiring

  1. Follow a standardised colour-coding system for wires (e.g., white for ground, brown for tail lights).
  2. Connect the corresponding wires from the trailer plug to the vehicle’s wiring system.
  3. Ensure a secure and weather-resistant connection to prevent corrosion.

Wiring Harness Installation

  1. Choose a quality wiring harness compatible with your vehicle and trailer.
  2. Locate the vehicle’s wiring harness connection point.
  3. Connect the wiring harness, securing it in place to prevent any interference with moving parts.
  4. Test the trailer lights to ensure proper functionality.

The Future of Trailer Plug Wiring: Trends and Innovations

Looking at a phone screen inside a vehicle

Looking ahead, the future of trailer plug wiring is brimming with exciting possibilities. As technology continues to evolve, we anticipate further enhancements in connectivity, efficiency, and automation. 

From wireless communication protocols to intelligent sensor integration, tomorrow’s trailer plugs promise to revolutionise the towing experience. 

At Ark, we remain at the forefront of these advancements, committed to delivering cutting-edge solutions that redefine the towing industry.

Stay Ahead With Ark’s Smart Connector

As the landscape of trailer plug technology evolves, one thing remains clear – our Smart Connector is leading the charge towards a safer, more efficient towing experience. 

With its unparalleled features, including automatic diagnostics, Bluetooth® connectivity, and seamless integration with our universal towbar wiring harness, the Smart Connector sets the standard for innovation in the industry. 

Stay ahead of the curve and elevate your towing setup with Ark’s Smart Connector, the future of trailer plug technology.

Looking for more cutting-edge towing gear? Check out our full range!

Categories: News

on

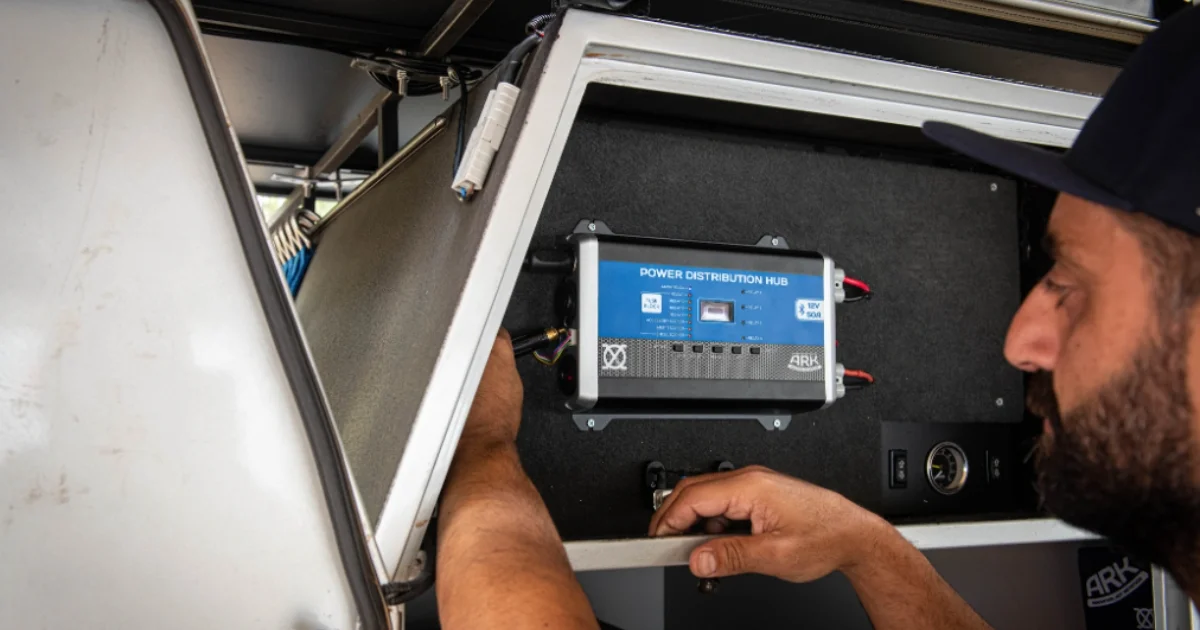
We strongly believe that camping is even better when you can bring the creature comforts of home along with you. That’s why we developed the XO Power Distribution Hub, to allow you to power and monitor all your devices without taking away from your camping experience

So, what exactly can you use a power hub for? In this guide, we break down the multiple uses and extensive benefits of these powerhouses.

The XO Power Distribution Hub: Enhancing Camping Comfort

The XO Power Distribution Hub is more than just a device; it’s a philosophy. Our goal is to empower campers to enjoy the convenience of modern technology without compromising the essence of camping. 

The PDH is designed to seamlessly integrate into your camping setup, providing a centralised and efficient power distribution system.

As the 2022 Global Media Award winner at the 2022 SEMA show, the XO PDH has more than proven its precision quality and unmatched reliability – but don’t take it from us. Let’s look at a customer’s experience with the PDH.

James’ PDH Setup: A Customer Perspective

Let’s take a look at how James, one of our satisfied customers, maximises the potential of the PDH in his camping adventures. 

With a standard setup using a Lithium 100aH battery, James has found the PDH to be a game-changer in these camping comfort areas:

Water Pump Switch

Useful for showers, washing dishes, and even rinsing the car when necessary.

Rooftent Power

The PDH powers into the rooftent, providing further flexibility. This power can be used to run additional lights or charge devices while sleeping.

Light Switches

Separate switches for interior and exterior lights. Controlling these through the app ensures the camp is well-lit without the need to get up.

Cigarette Socket

Used to create a charger hub, running phone and device chargers while stationary.

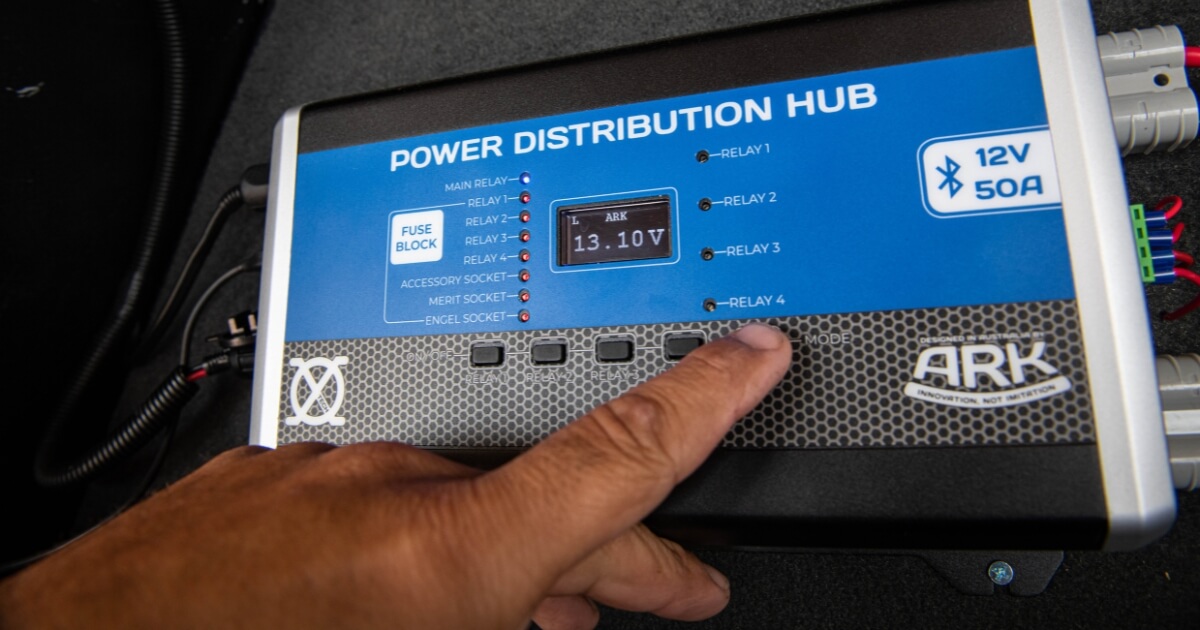
Close up of the Ark XO Power Distribution Hub

Additional Applications of the PDH

While James has a comprehensive setup, the PDH offers even more possibilities for enhancing your camping experience. If you’re still asking ‘what can I power with a PDH power hub?’ then we’ve got a few more essentials just for you:

Inverter Trigger Switch

Allocate a switch to trigger your inverter. Adding an inverter to your setup may allow you to run induction cooktops, charge power tools, or anything with a standard 240v house plug.

TV Switch

Link your 12V TV to a switch and power it on from your phone for convenient entertainment.

Air Compressor Switch

Connect a switch to your air compressor, allowing you to pump tyres using the off switch from your phone.

Fridge Switch

Allocate a switch to your fridge, eliminating the need to draw power continuously. This feature enables you to power the fridge only when necessary, especially during travel.

Portable Camp Kitchen

Power your way to delicious home-cooked meals on your off-road adventure with the PDH. Use it to power the ultimate portable camp kitchen complete with stoves, microwaves, and even mini ovens.

Power Your Adventures the Smart Way

The XO Power Distribution Hub is a versatile solution that goes beyond traditional camping setups. It empowers campers to bring the comforts of home to their outdoor adventures without compromising the essence of camping. 

James’ setup is just one example of how the PDH can be customised to suit individual needs, and we hope you got a bit of inspiration from his success story. Plus, check out our canopy setup ideas for tips on how and where to mount your power distribution box.

At Ark, we’re committed to providing innovative solutions for modern camping and 4×4 needs. The XO Power Distribution Hub is a testament to our dedication to enhancing the camping experience. 

So, what are you waiting for? Elevate your camping adventures with Ark’s XO Power Distribution Hub – where modern convenience meets the great outdoors.Looking for more portable power options for your next 4×4 trip? Check out our ultimate guide to portable power!

Categories: News

on

Are you preparing for an off-road adventure with your camper trailer and want to ensure your trailer lights are wired correctly? 

Trailer lights themselves are must-haves when it comes to 4×4 accessories, and knowing how to wire them is crucial for safety and compliance with road regulations. 

In this guide, we’ll take you through the process of wiring trailer lights for your off-road camper trailer or caravan.

Understanding Trailer Light Wiring Basics

Trailer light wiring may seem intimidating with its multitude of wires and connectors, but we’re here to help. 

Trailer lights typically require functions like brake lights, turn signals, and tail lights. Some trailers may also need side markers, running lights, or electric brakes. 

Knowing the various wire colours and functions is key to ensuring a safe towing experience.

Related: How to Choose the Right Wheel Bearing For Your Trailer

The Ideal Wiring Setup for Your Off-Road Camper Trailer

Wire colours diagram

Credit: Mechanical Elements

For lighter-duty trailers without brakes, a common choice is the 4-pin flat connector. 

This setup includes wires for ground, tail lights, left turn signal, and right turn signal. It’s suitable for consumer-type trailers like small utility trailers and off-road trailers.

Trailers with electric brakes typically require a 5-pin flat connector. In addition to the functions of the 4-pin setup, the 5th wire (blue) is used for electric brakes control.

For trailers with complex electrical needs, like auxiliary power and back-up lights, a 7-pin connector is recommended. This style is common for bigger trailers like RVs and offers additional functionality.

Step-by-Step Guide: How to Wire Your Trailer Lights

Materials Needed:

  • Crimp Connectors
  • Cable Ties
  • Electrical Tape
  • New Lights and/or Wiring
  • Heat Shrink

Tools Required:

  • Basic Mechanic’s Tools
  • Wire Strippers
  • Terminal Crimper
  • Heat Gun

Wiring Steps:

  1. Connect Trailer: Start by connecting your trailer to the tow vehicle for a stable workspace.
  2. Run New Wiring: Take the trailer harness and run it down one side of the trailer, either through the chassis rail or attached to the trailer frame with cable ties.
  3. Trim Excess Wires: Trim any unnecessary wiring from the trailer harness.
  4. Strip Insulation: Strip insulation from all wires in the trailer harness.
  5. Mount New Trailer Lights: Mount the lights to each side of the trailer, ensuring they match the old lights’ positions.
  6. Connect Wiring: Connect the wires from the lights to the new wiring, sealing each connection with heat shrink.
  7. Test: Connect the trailer plug to the tow vehicle socket and test the lights.
  8. Finalise the Wiring: Seal all connections with electrical tape to protect them from moisture and dirt.

Globe Lights vs LED Lights: Which Type is Best For You?

Globe light and LED light

Globe Lights

Globe lights, also known as incandescent lights, have been the standard vehicle light choice for many years. They emit a warm, familiar glow and are relatively inexpensive to purchase. 

Globe lights are readily available and easy to replace when needed. However, they have several drawbacks compared to LED lights. 

Globe lights consume more power, meaning they drain your battery faster, which is particularly important when off-grid. 

They also have a shorter lifespan and are more prone to breaking due to their delicate filaments. 

Globe lights can also generate more heat, which can be a concern in enclosed spaces or during hot weather.

LED Lights

LED lights, on the other hand, offer numerous benefits that make them a popular choice for off-road camper trailers. 

LED lights are highly energy-efficient, consuming significantly less power than globe lights. This means they put less strain on your battery and can extend your battery life, making them ideal for off-grid adventures. 

LED lights also have a much longer lifespan, lasting up to 50 times longer than traditional globe lights. They’re also more durable and shock-resistant, making them better suited for rugged off-road conditions. 

LED lights produce little to no heat, reducing the risk of fire hazards and making them safer to use in confined spaces.

Wiring Trailer Lights: Essentials for Your Off-Road Adventures

Wiring trailer lights for your off-road camper trailer may seem daunting, but with the right guidance, you can set up your trailer for a safe towing experience. 

By following wiring standards and using appropriate connectors, you can ensure your trailer lights function properly, enhancing visibility and safety on the road.
Further reading: Looking for more must-have gear for your next off-road adventure? Master your trips with our Jerry Cans & Fuel Planning Guide

Categories: News