on

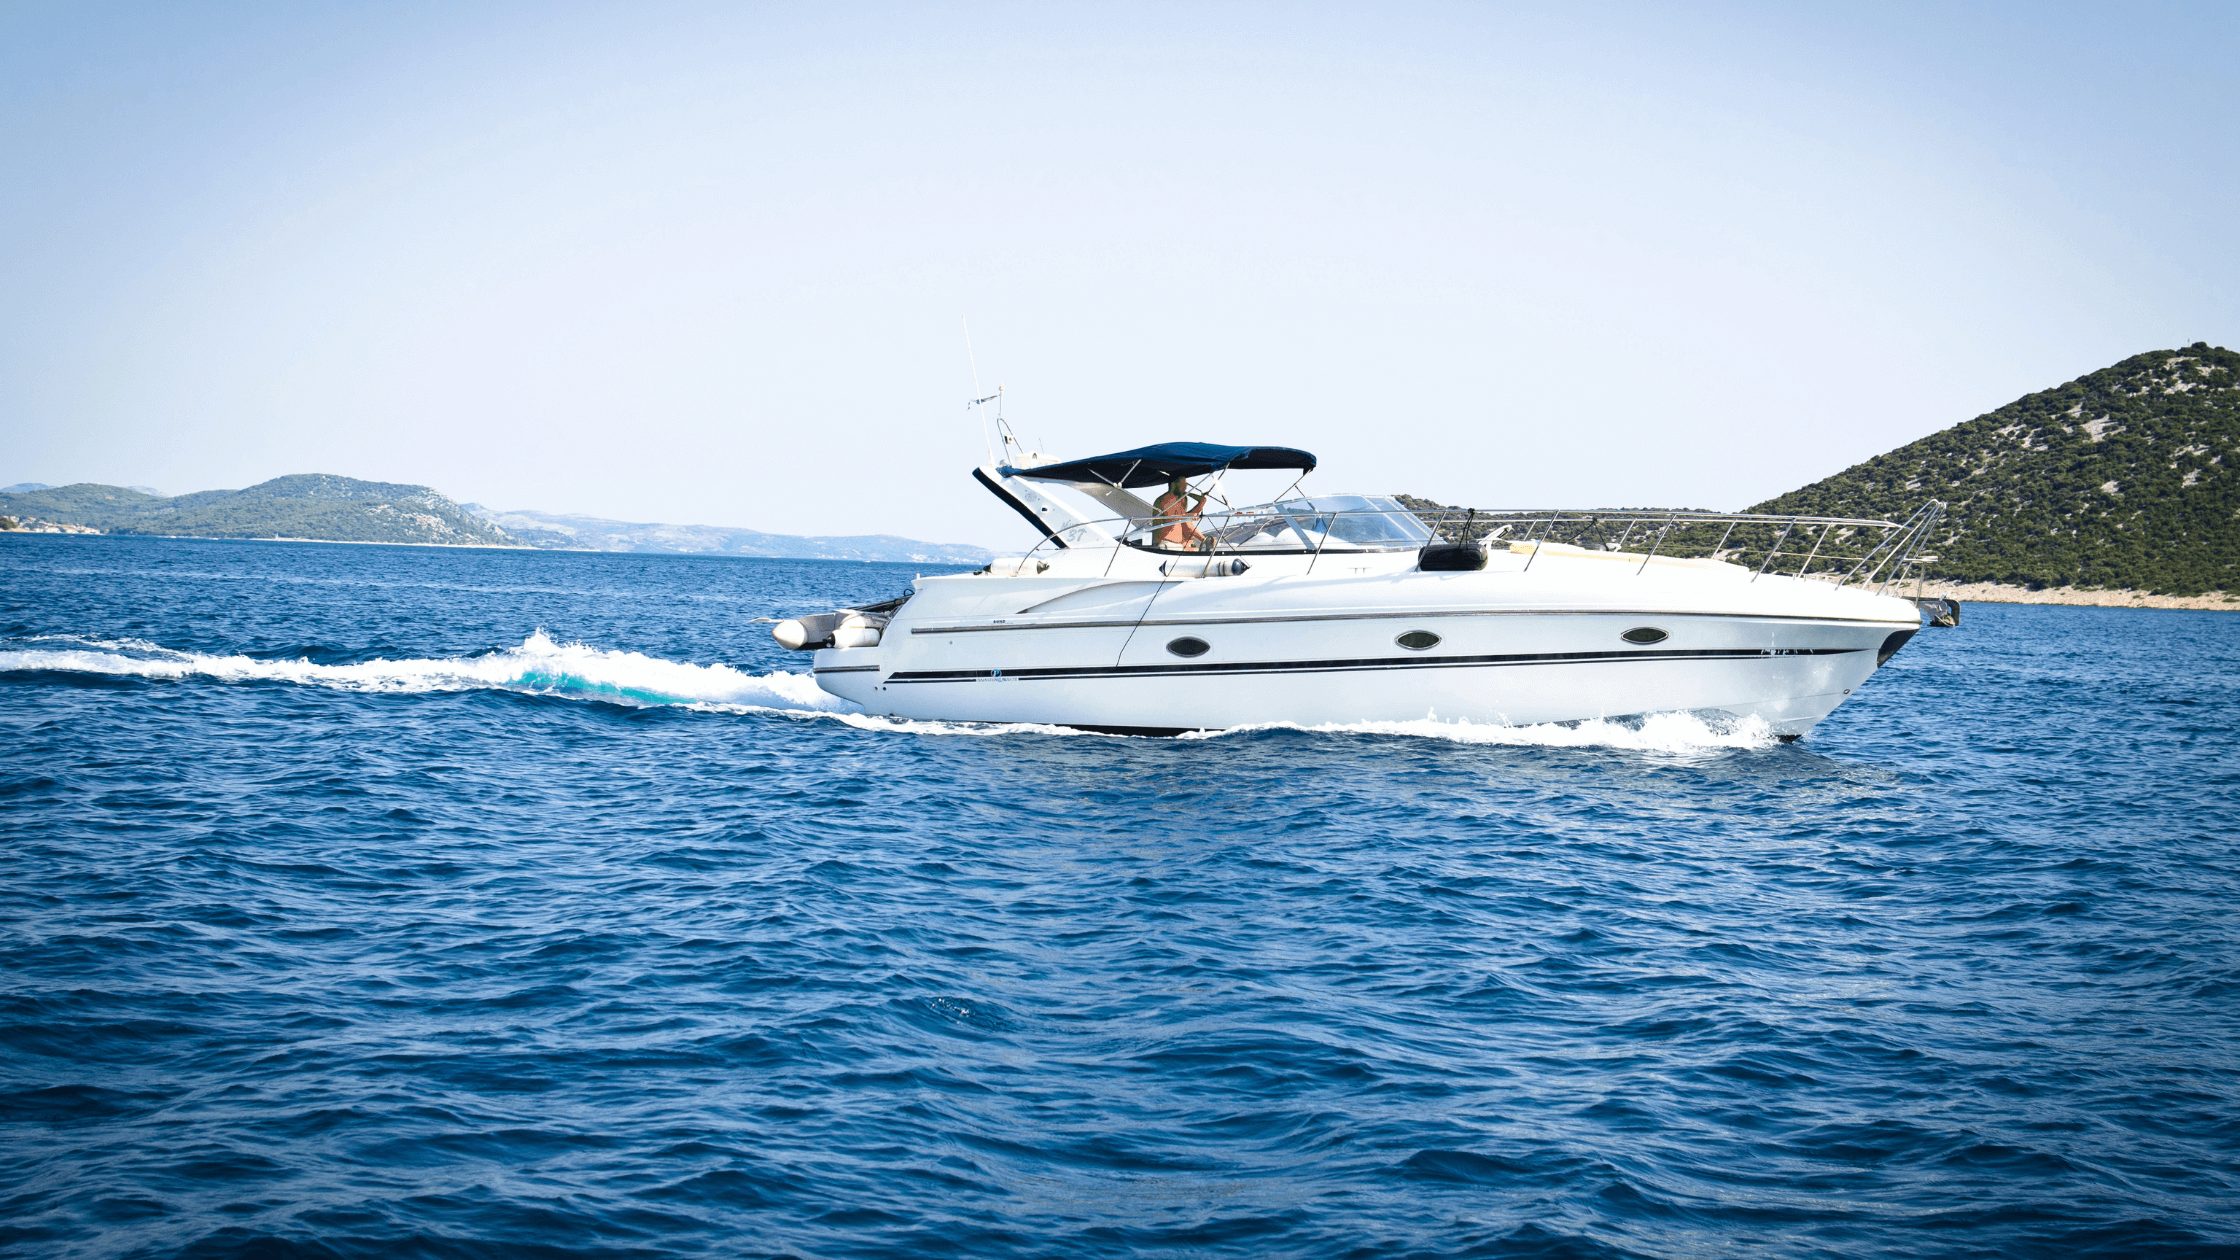
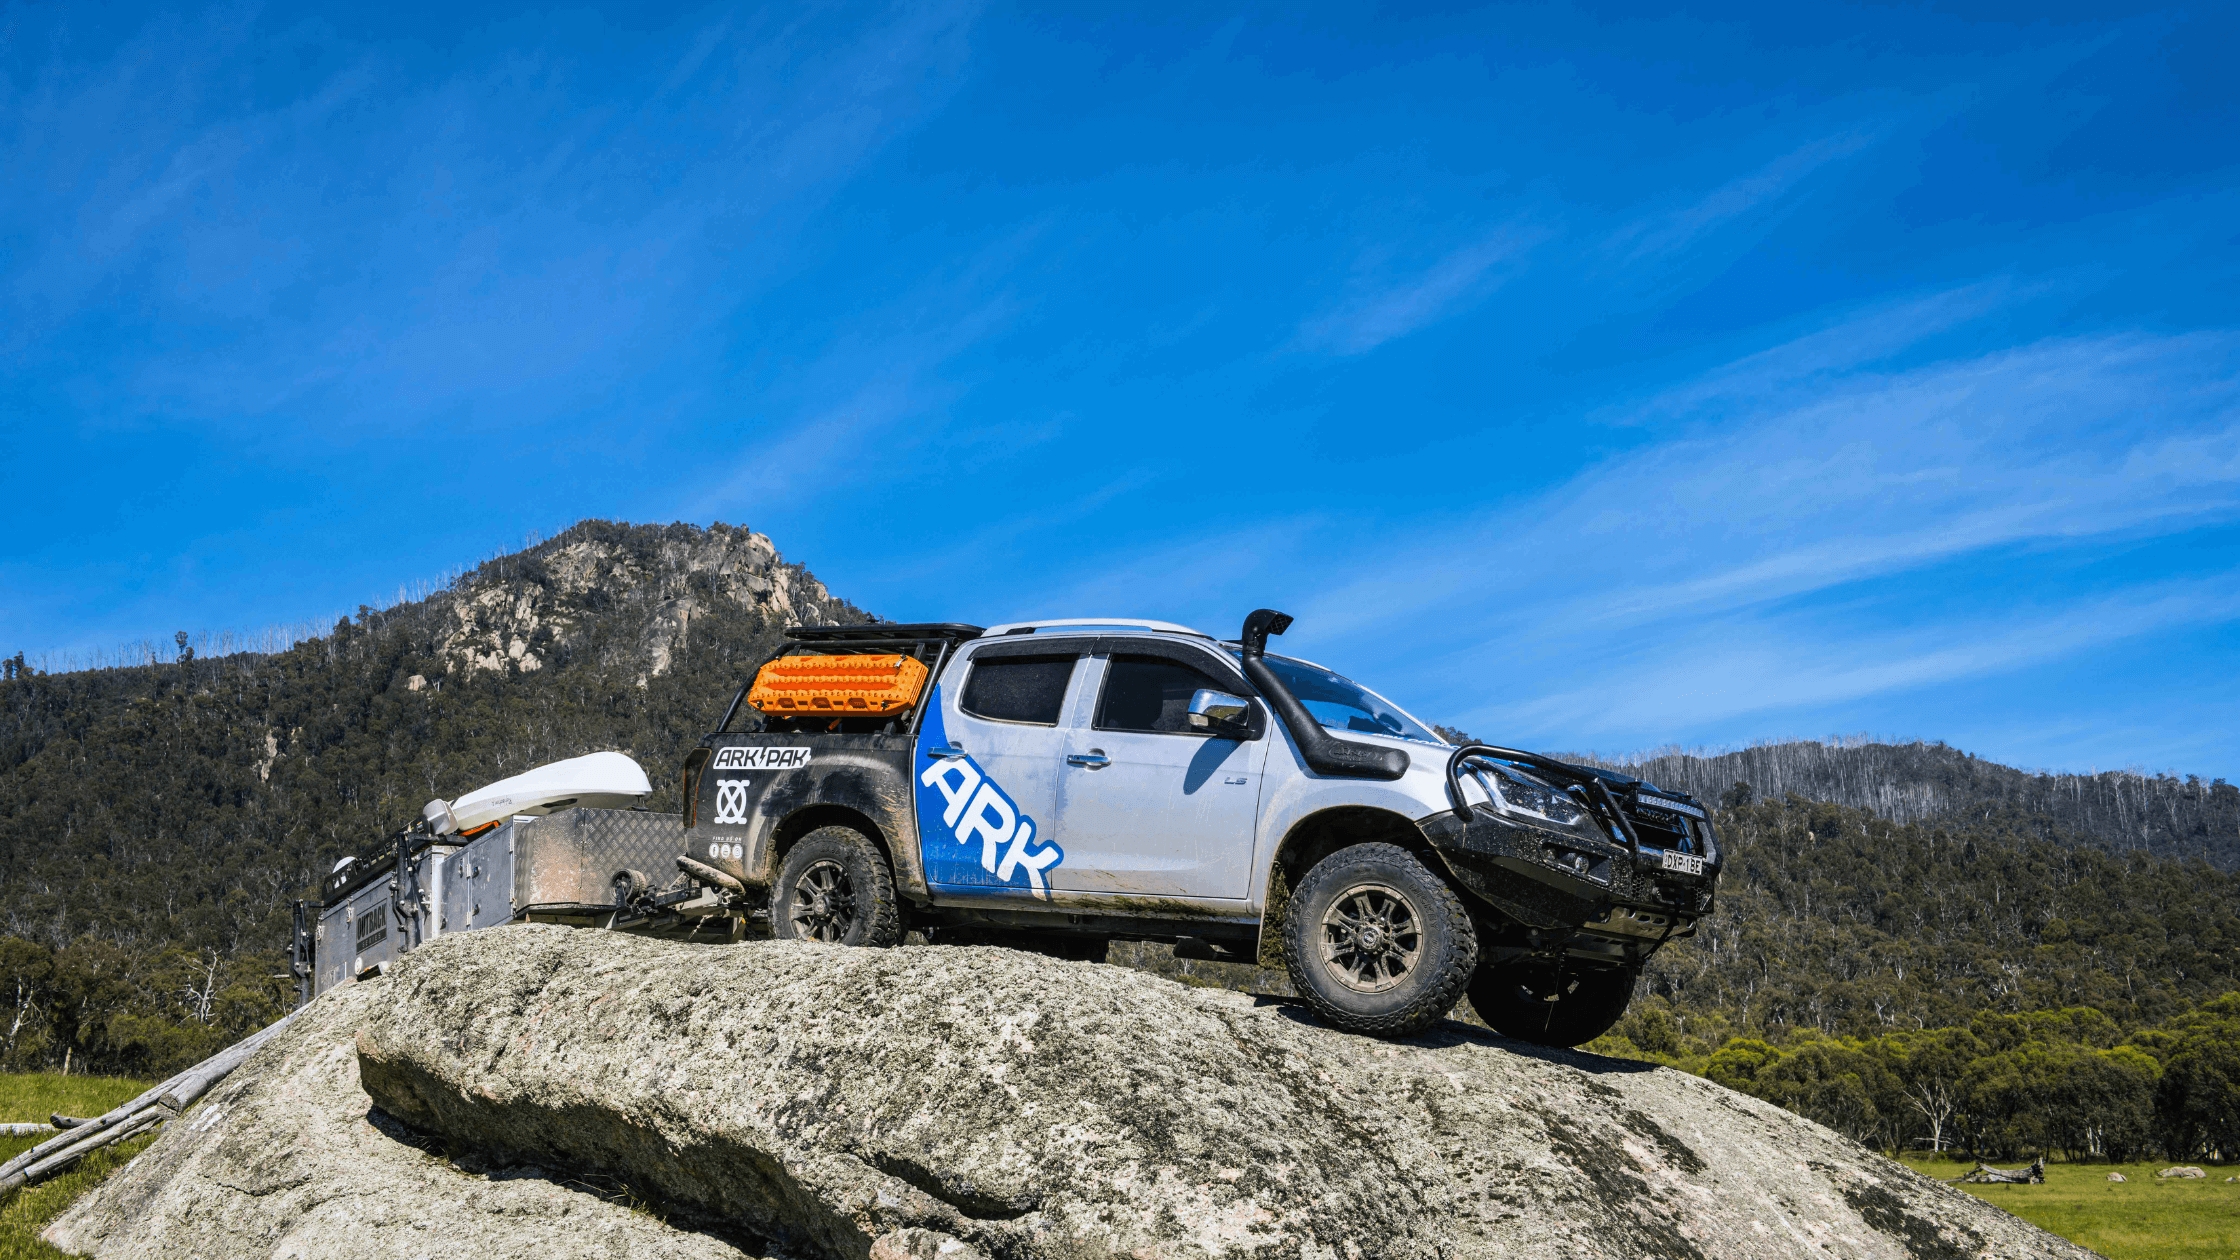
For many people who like to hit the tracks with a camper trailer, caravan or boat in tow, improving on the standard trailer towing gear you’re using is often necessary. Because we’re all different, and we all have different desires when it comes to hitting the tracks and heading to our favourite campsites, our towing needs are also different. For some people, the adventure of taking the gnarliest tracks to our favourite campsite is part of the fun, while others will prefer getting to camp as quickly and easily as possible so they can crack open the esky and wet a line. That means that the towing gear that comes standard with your trailer may not be the ideal gear for you, and when it comes to towing there’s one component that is hugely important to get right – your trailer coupling.

What is a Trailer Coupling?

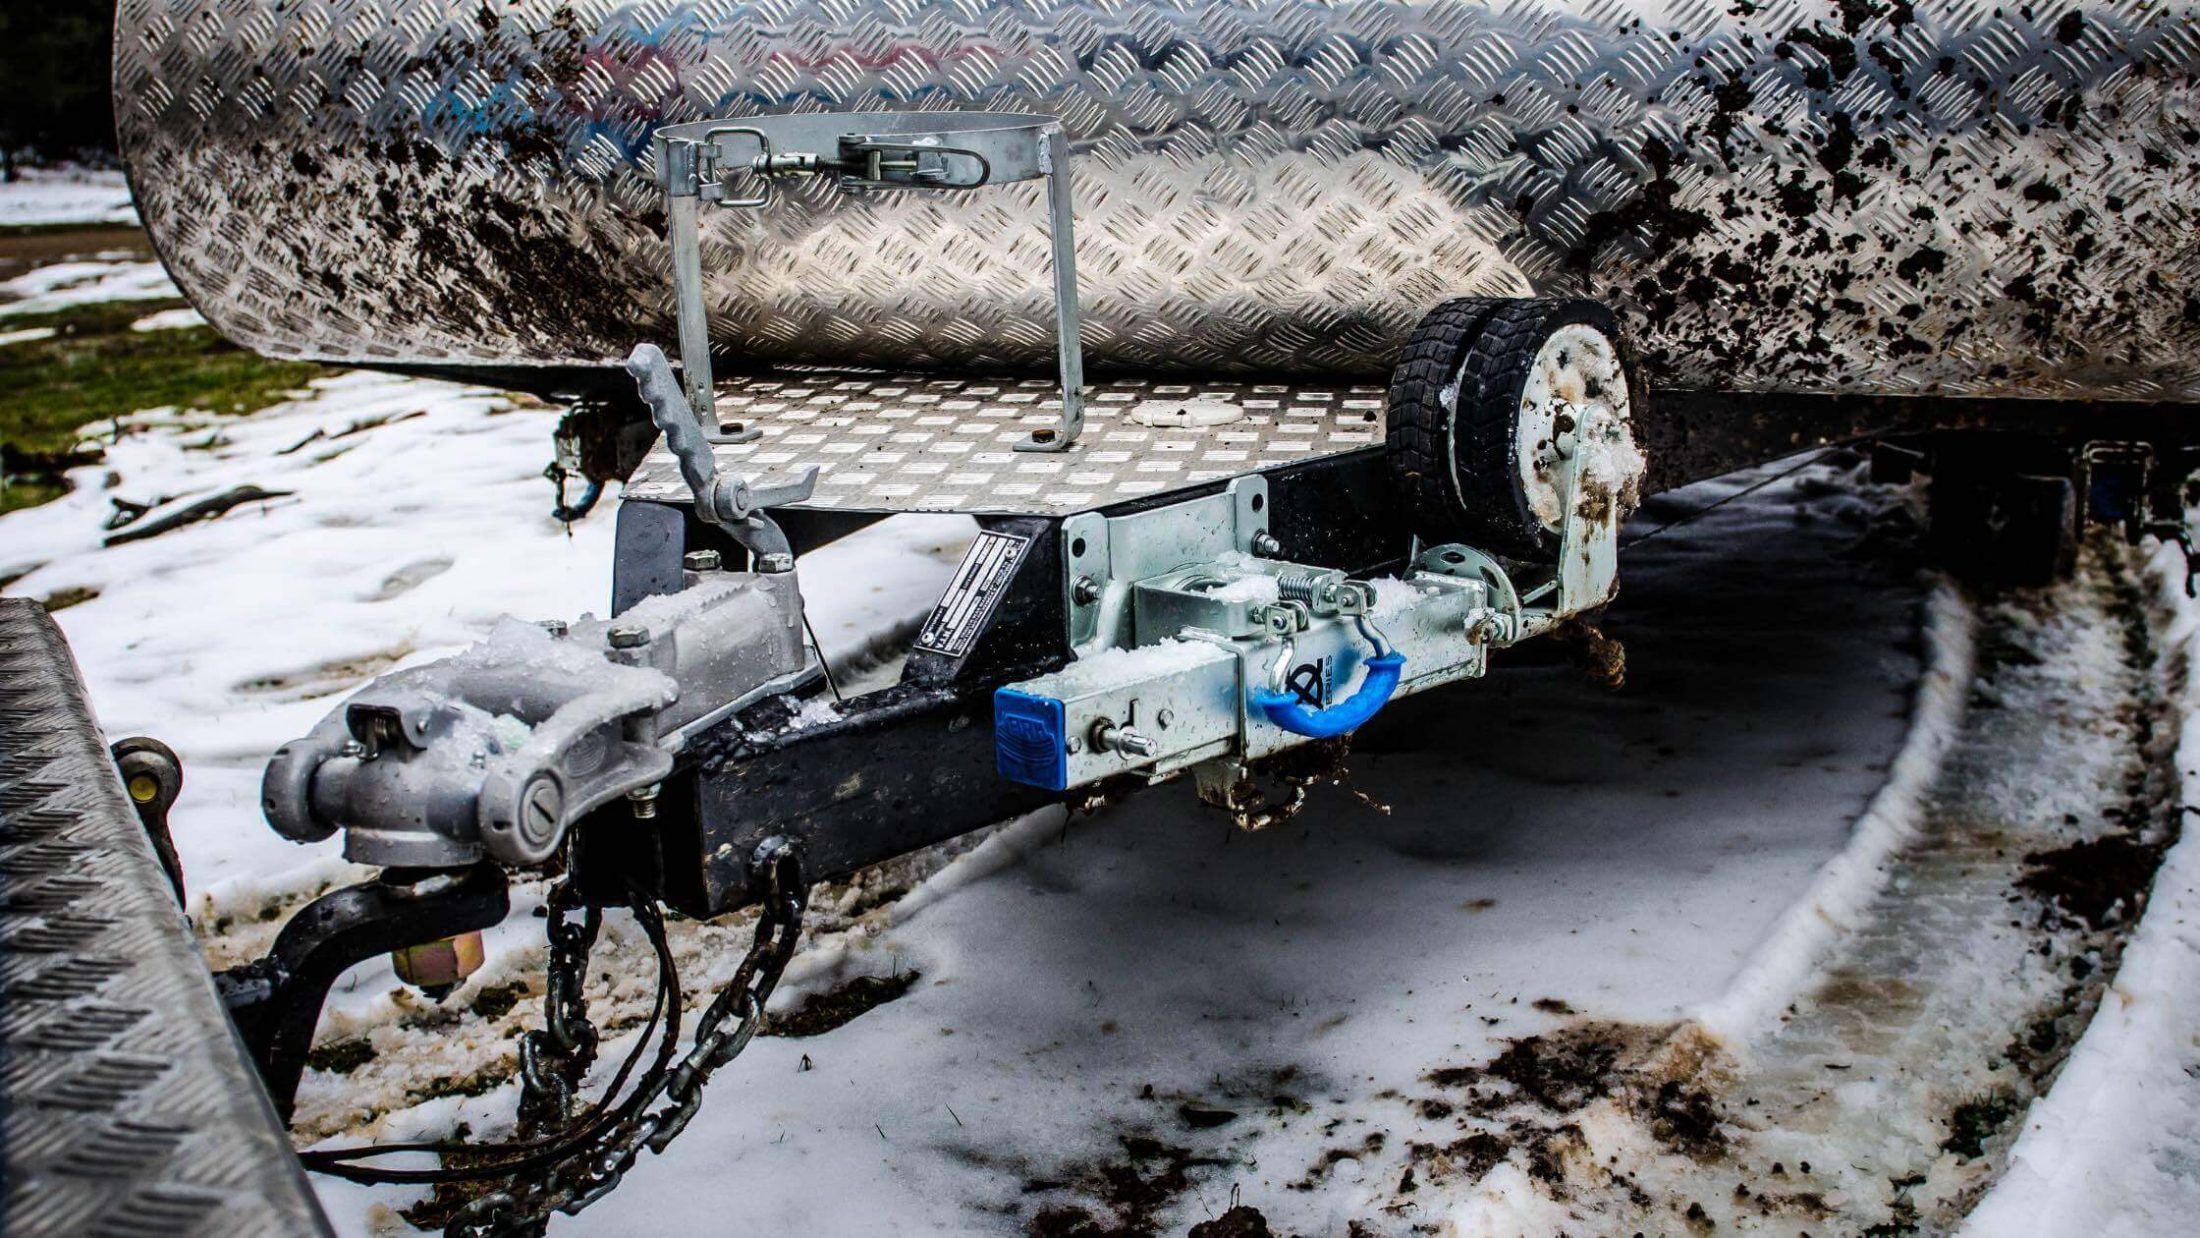
A trailer coupling is the essential link between your trailer and your tow vehicle. It’s the component that is fitted to the leading edge of the A-frame of your trailer, and which connects to the tow hitch on your tow vehicle.

It’s REALLY important to mention this: the trailer coupling is NOT the tow hitch. Time and again we see so-called “expert” 4WD and off-road publications and shows referring to the coupling as a “hitch”. This is incorrect. The coupling is the component on your trailer, whereas the hitch is the component on your tow vehicle. It’s a pretty basic distinction, but something that people get wrong a lot of the time.

What does a Trailer Coupling do?

As already stated, a trailer coupling connects to the tow hitch on your tow vehicle, but the thing is, it’s far more important than just being a connector. It needs to be able to withstand the loads you’re towing, whether it be a small little 700kg box trailer with no brakes or a 3.5t off-road caravan with a full kit out and electric brakes.

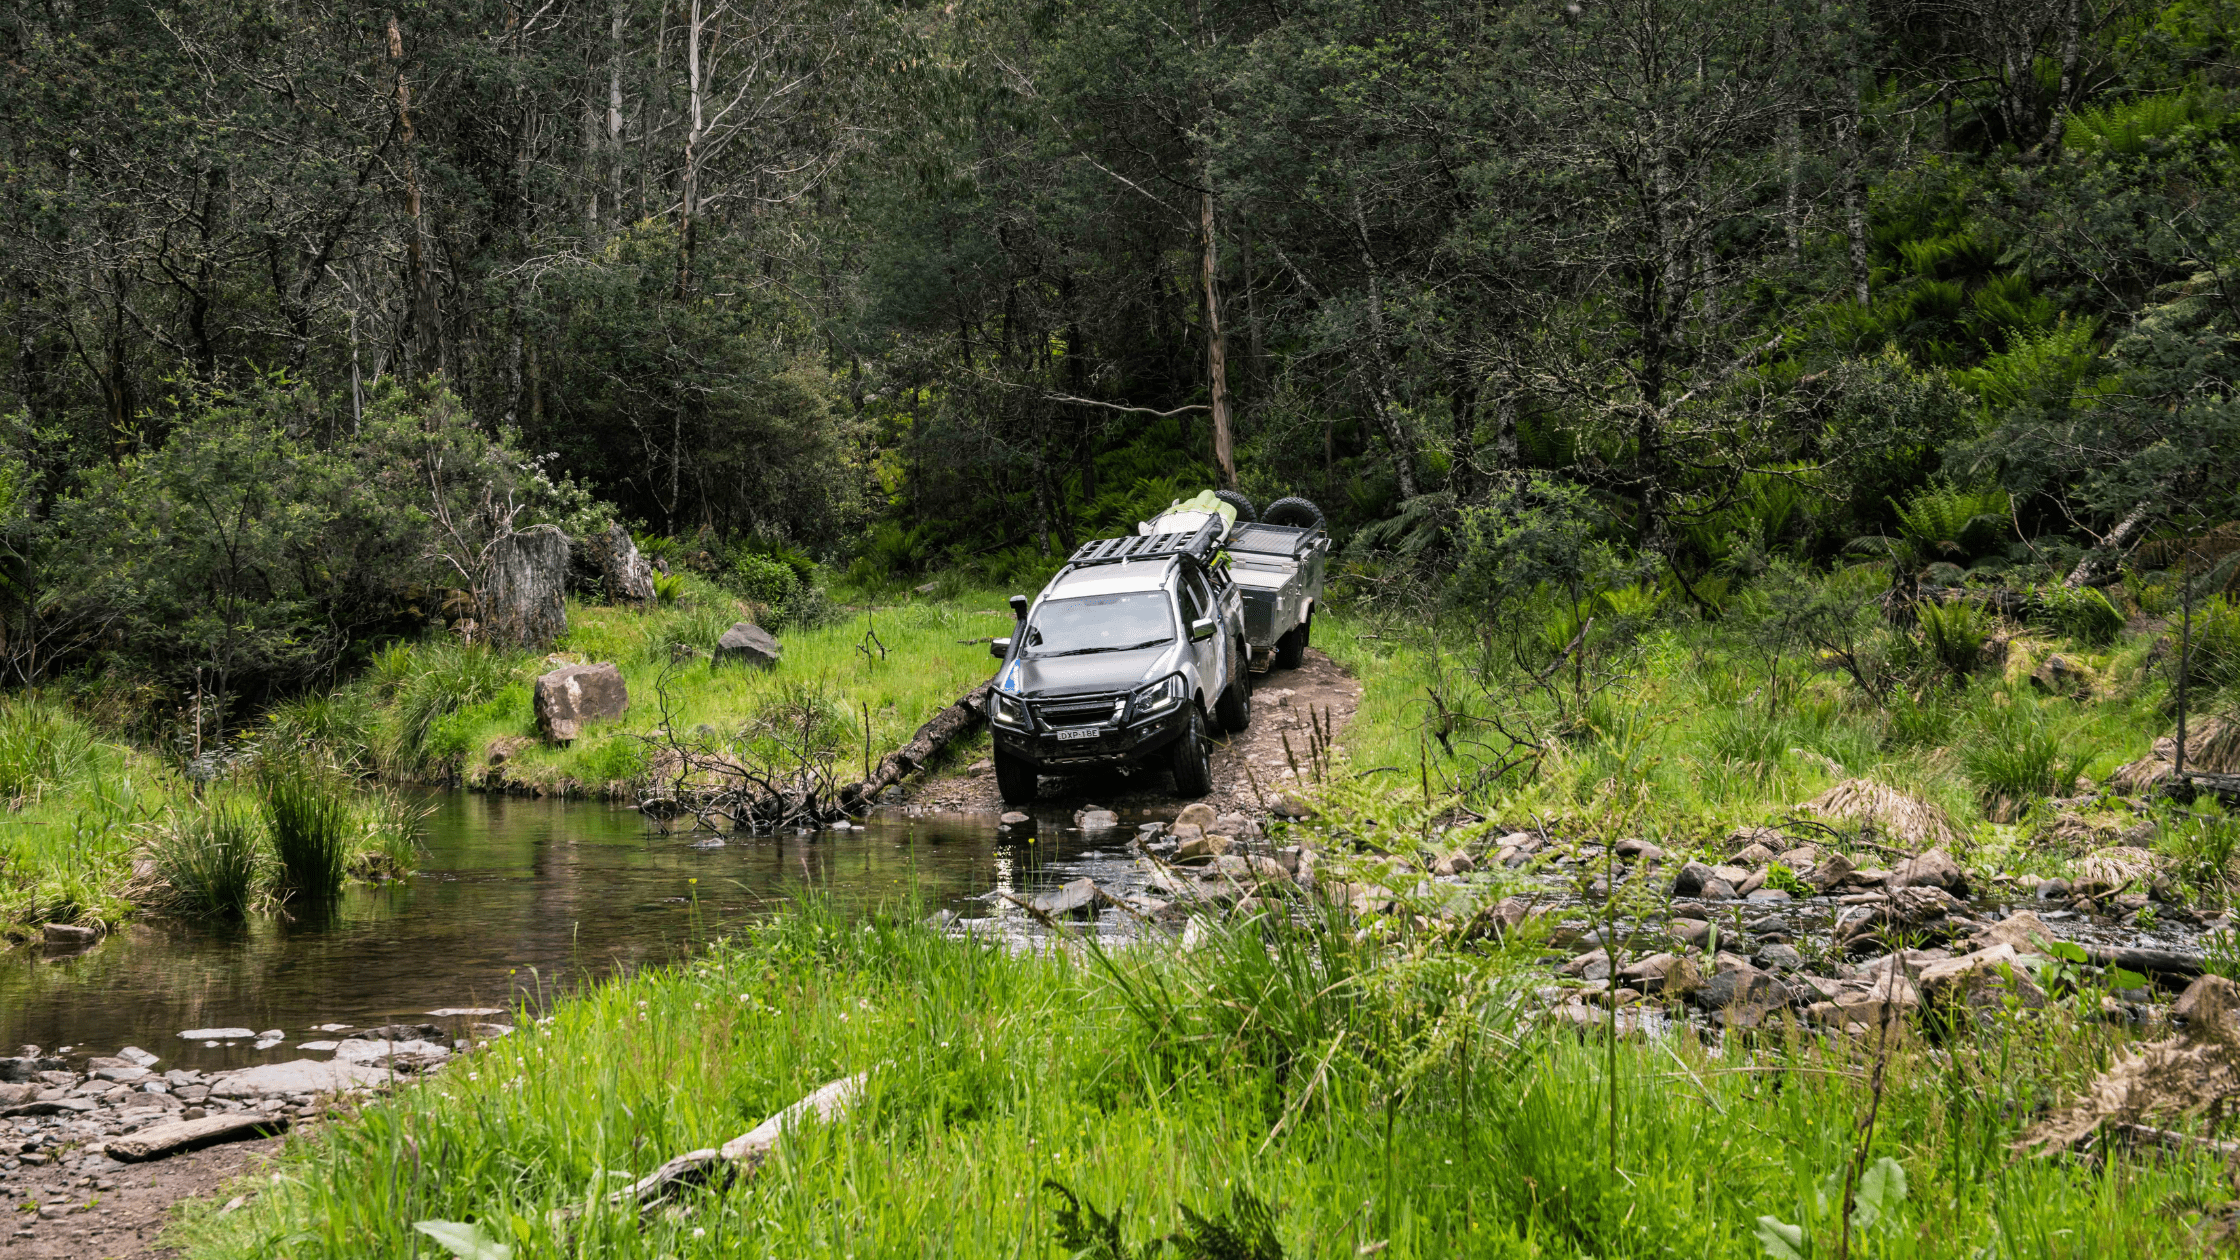
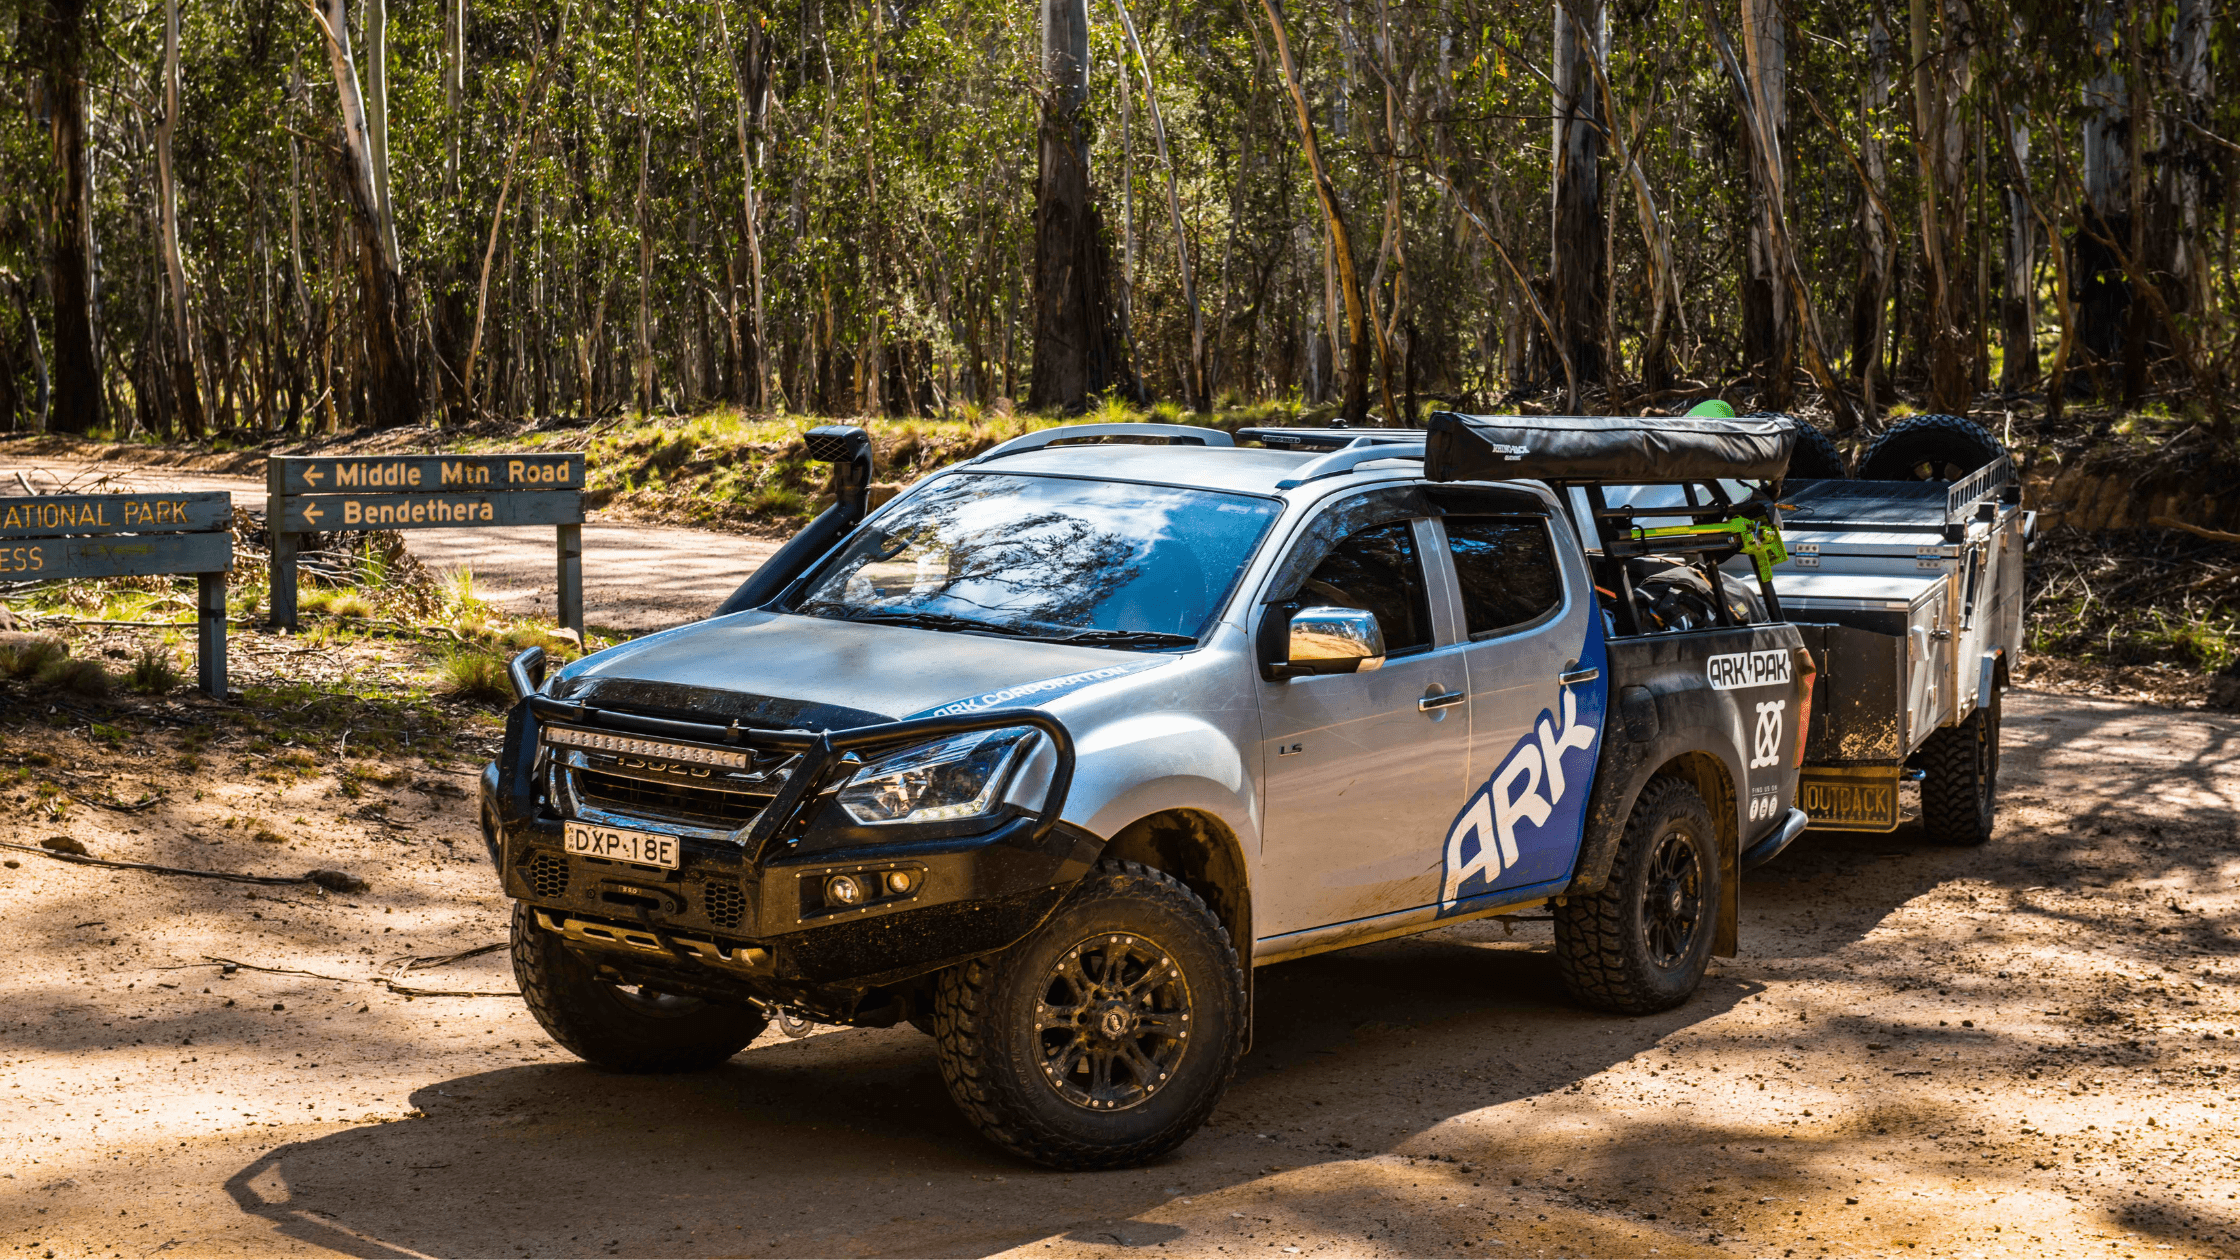
It also needs to be able to handle any articulation that you demand of it, something that is especially relevant if you’re planning to tow off-road whether that be on soft sand beaches, or rough and complex 4WD tracks. 

The Different Types of Trailer Couplings

There really is a lot of different types and styles of trailer coupling on the market, all with different strengths and weaknesses. Which coupling works best for you will depend on your needs, i.e. what and where you’re planning to tow. There are also different couplings to suit different types of tow hitches, from your standard 50mm ball hitch to an off-road specific polyblock hitch. We’re going to look at three main types of couplings: fixed couplings, over-ride couplings, and off-road couplings.

Before we do, it’s worthwhile to take a quick refresher on the legalities surrounding brake requirements on trailers. In a nutshell, there are essentially three levels. For trailers that are hauling a weight of under 750kg (including the trailer weight), no trailer braking system is required. For trailers that are hauling a weight of between 750kg and 2000kg (again, including the trailer weight) the trailer must have either a mechanical or hydraulic braking system fitted. And lastly, for any trailer that is hauling over 2000kg (you guessed it – including the weight of the trailer), it’s a legal requirement for your trailer to be fitted with electric brakes that are controlled by an electric brake controller.

With that out of the way, let’s take a look at the different coupling types. 
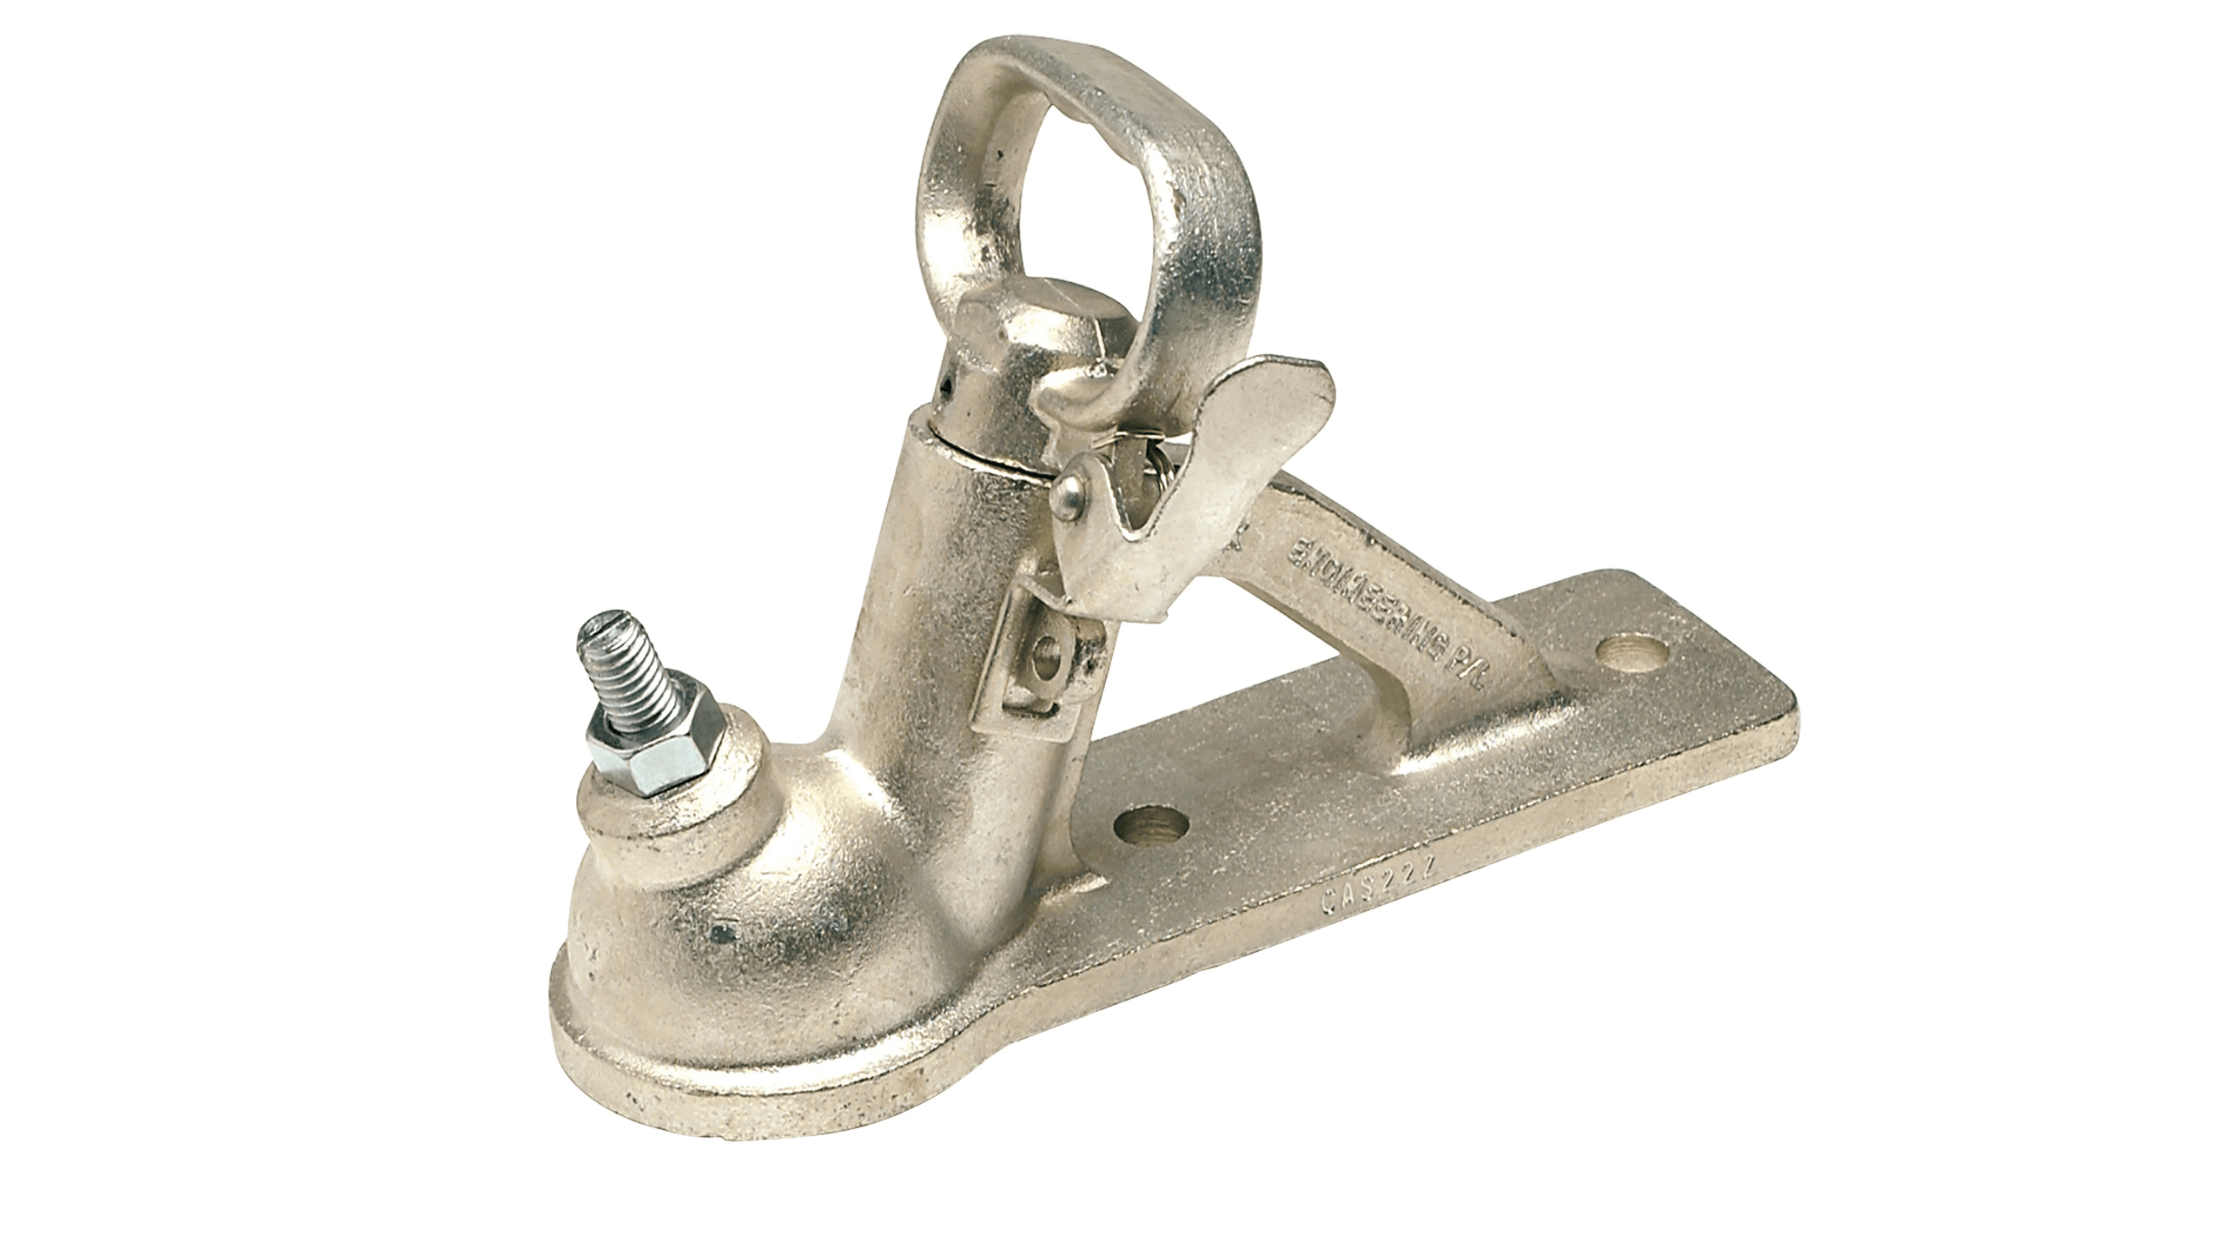
Fixed Couplings 

The most common type of coupling, simply because of how basic they are. A fixed coupling, such as Ark’s 3 Hole 50mm Coupling simply bolts onto the chassis of your trailer and connects to the standard 50mm ball hitch of your tow vehicle. A basic fixed coupling is relatively limited in how much articulation it offers, so it’s best suited to towing up to 2,000kgs on the road.

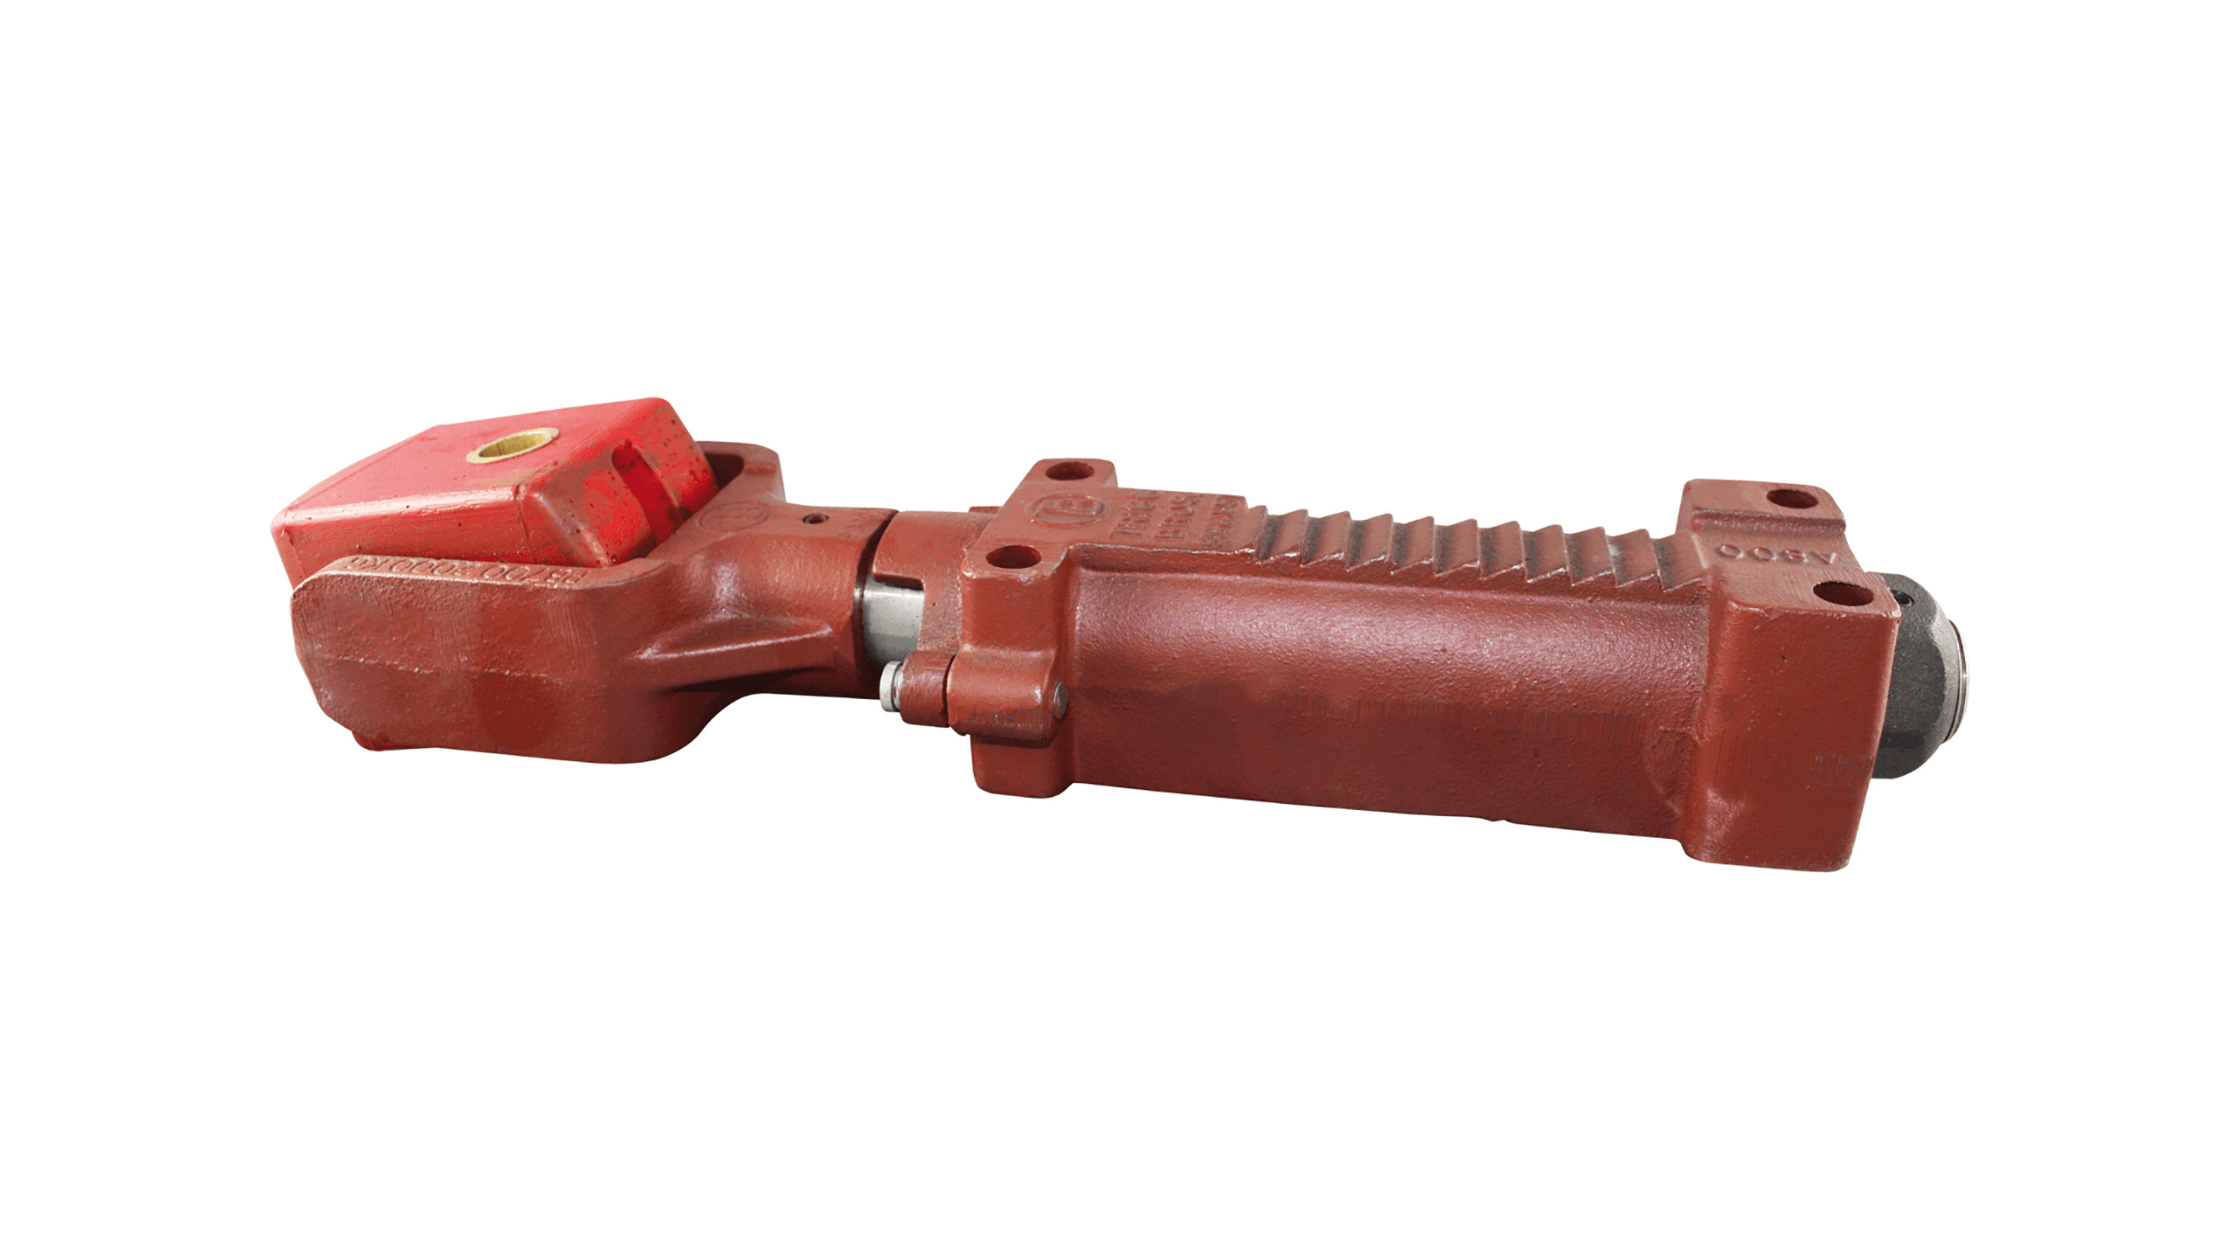
There are also fixed couplings that are capable of towing heavier trailers with electric brakes, such as Ark’s Electric Coupling with Ratchet Handle for 50mm Ball Hitches. This hitch is rated for up to 3500kg trailers that are fitted with electric brakes, and like the basic coupling works with the standard 50mm ball hitch. These couplings also offer relatively limited articulation, which means they’re best suited to on-road towing of things such as car trailers.

Over-Ride Couplings

Over-ride couplings are the next step up from a fixed coupling and are designed to activate the mechanical or hydraulic brakes on your trailer via an inertial-activated mechanism. As we know, any trailer that is hauling weights of between 750kg and 2000kg are required to be fitted with mechanical or hydraulic brakes, and an over-ride coupling such as Ark’s 50mm Over-Ride Coupling is designed specifically for this.

Here’s how they work: As the driver brakes, the coupling feels the inertial force the tow vehicle is applying to it, and it compresses a spring within it. When this spring is compressed, the brakes are triggered.

Off-Road Couplings 

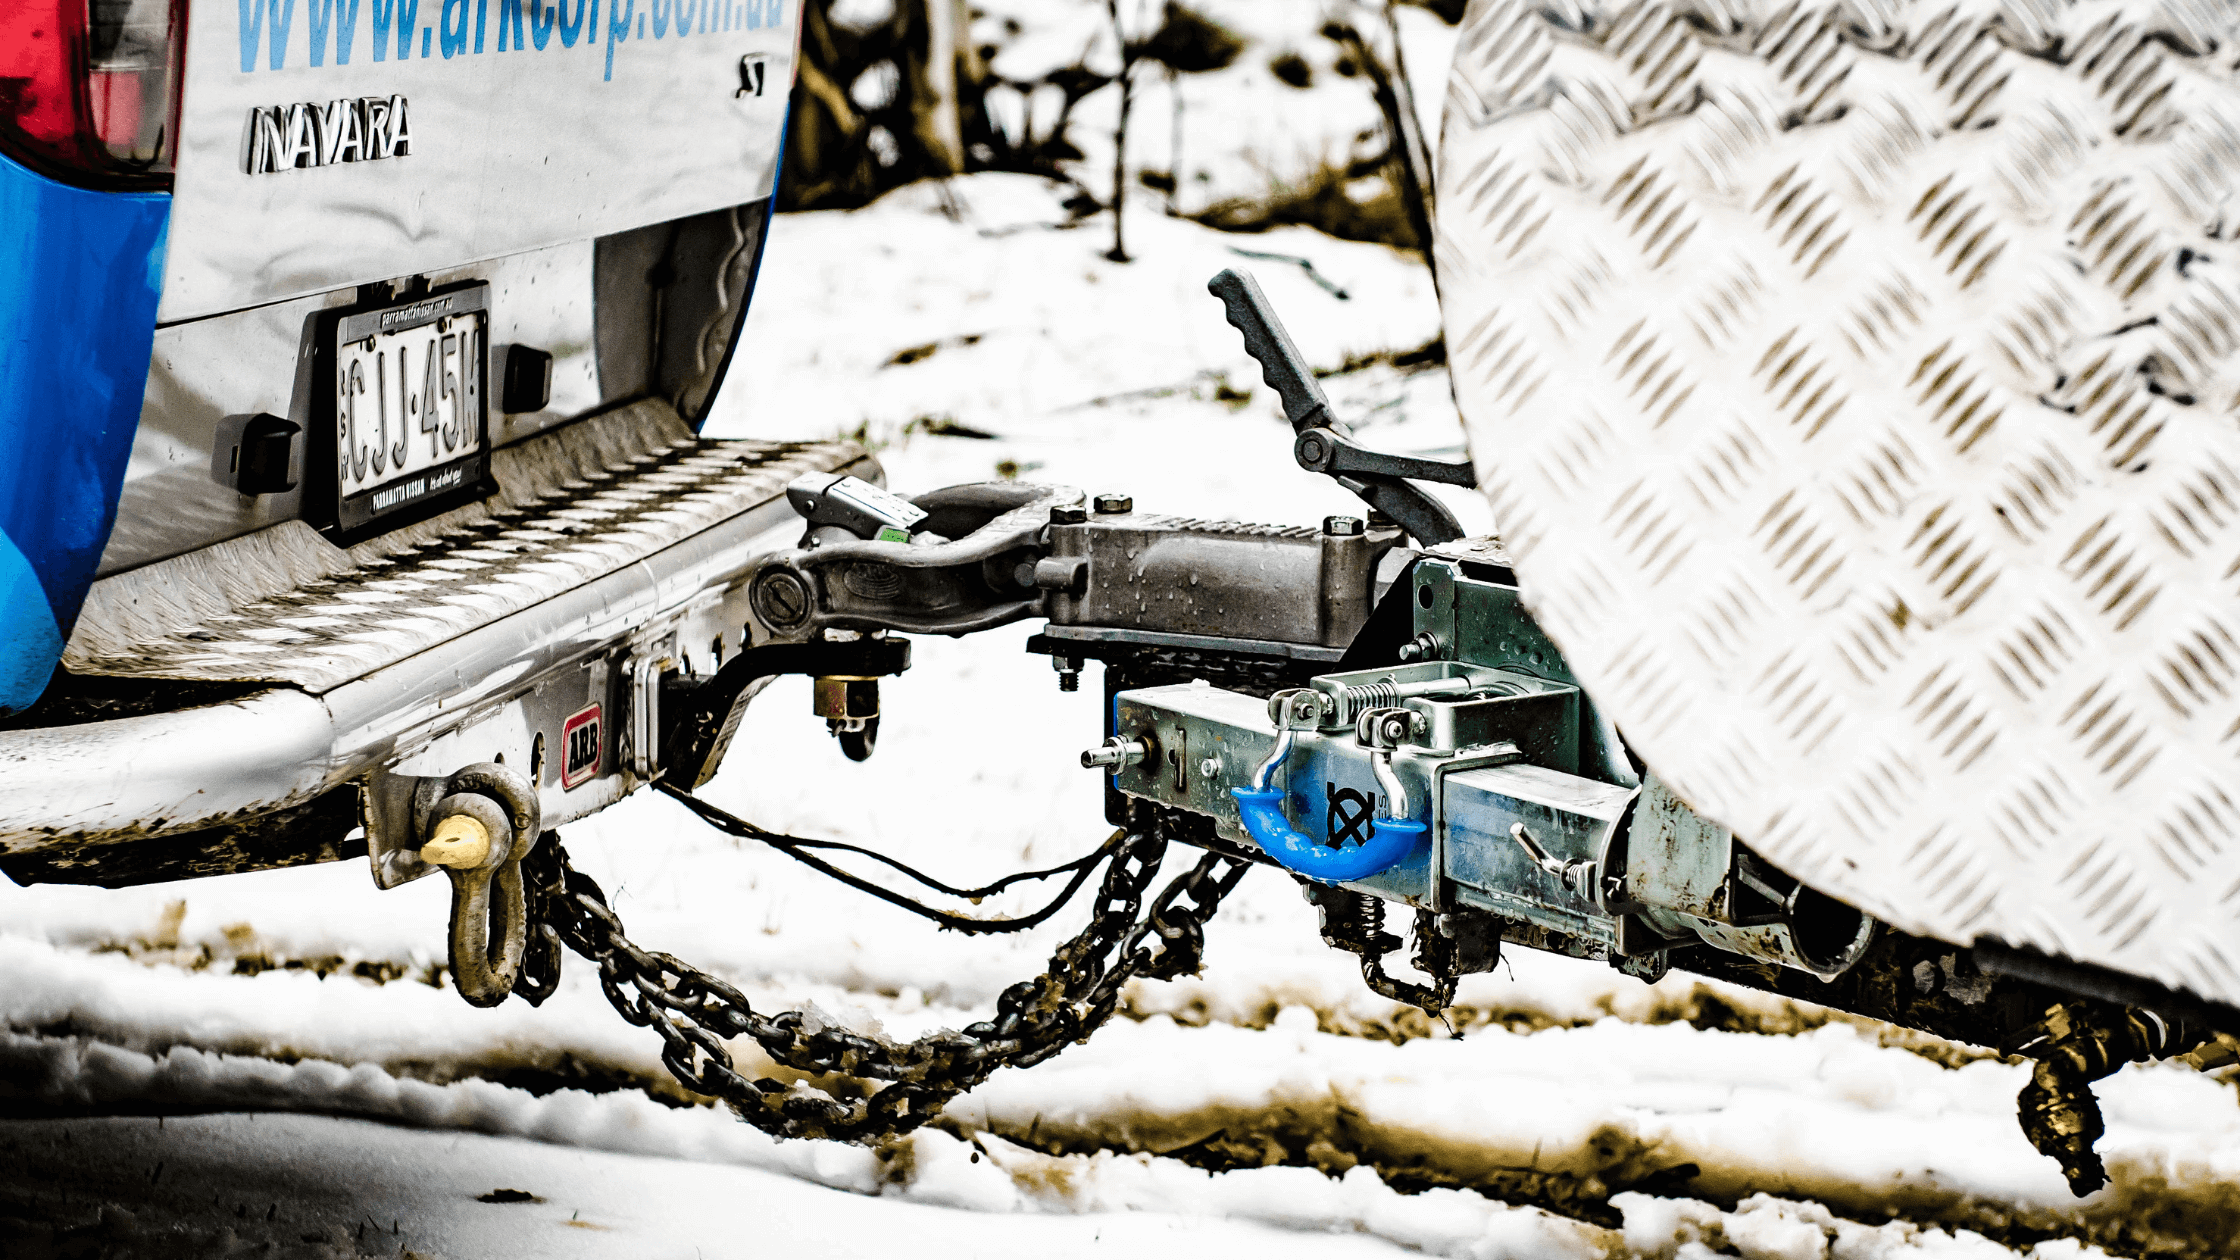
There are many different types of off-road couplings that are specifically designed to tow your camper trailer, caravan, or boat on the vastly varying 4WD tracks Australia has to offer. Off-road couplings are designed to provide a great degree of articulation across all three axiis (i.e. yaw, pitch and roll), and they achieve this in varying ways. Off-road couplings will often require a matching style of off-road hitch.

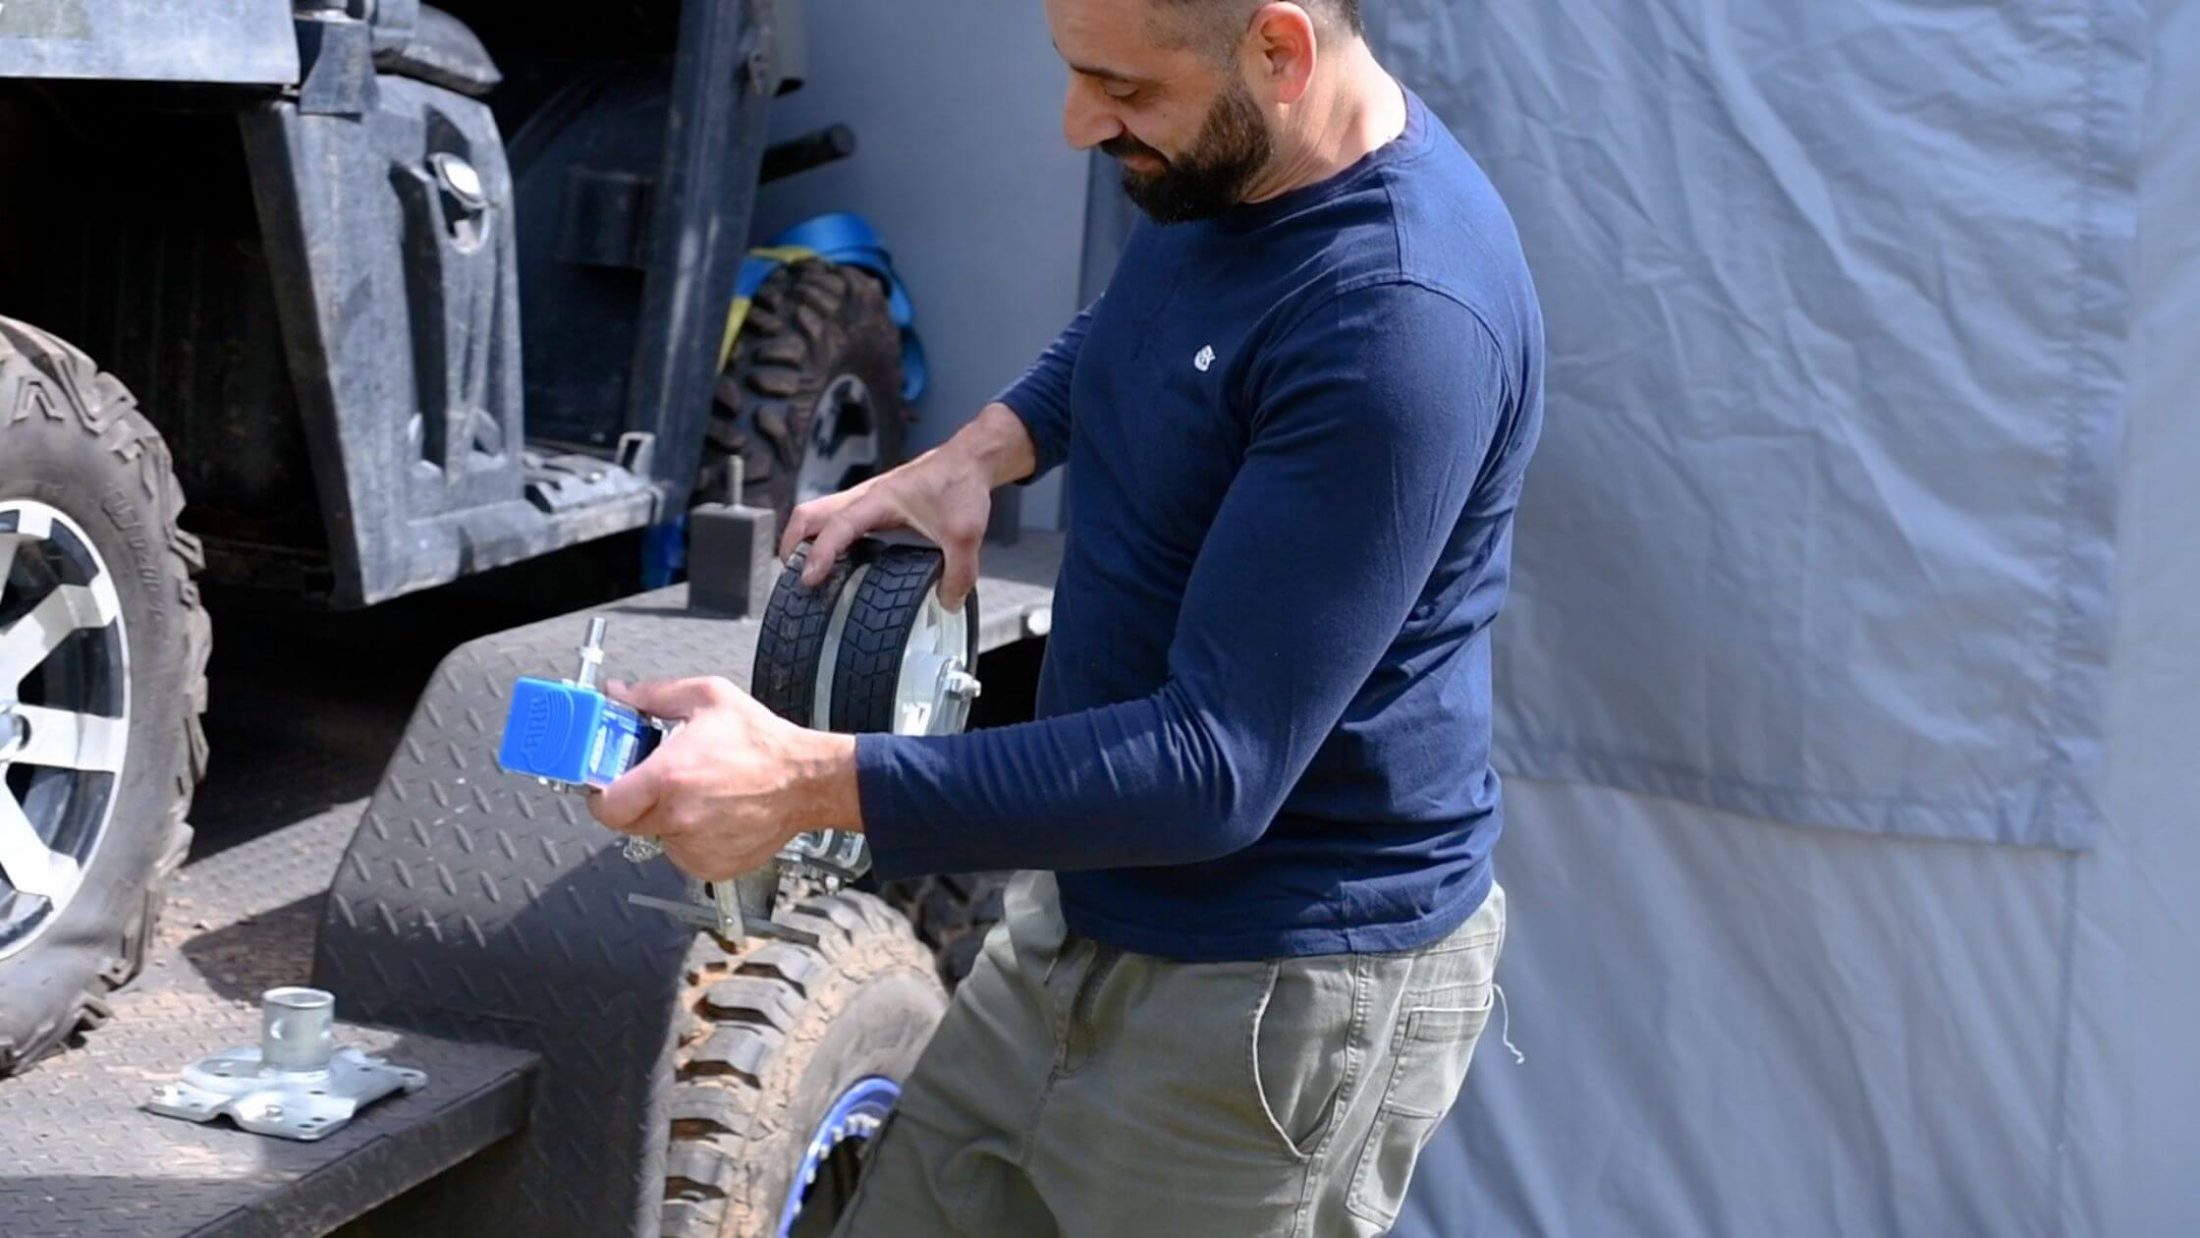
One common type is the polyblock style of coupling. Rather than utilising the standard 50mm tow hitch, the polyblock coupling utilises a plastic block that connects to the hitch via a through-pin. A coupling of this type provides a full 360 degrees of roll, which goes a long way to preventing your trailer from rolling in extreme off-road conditions.

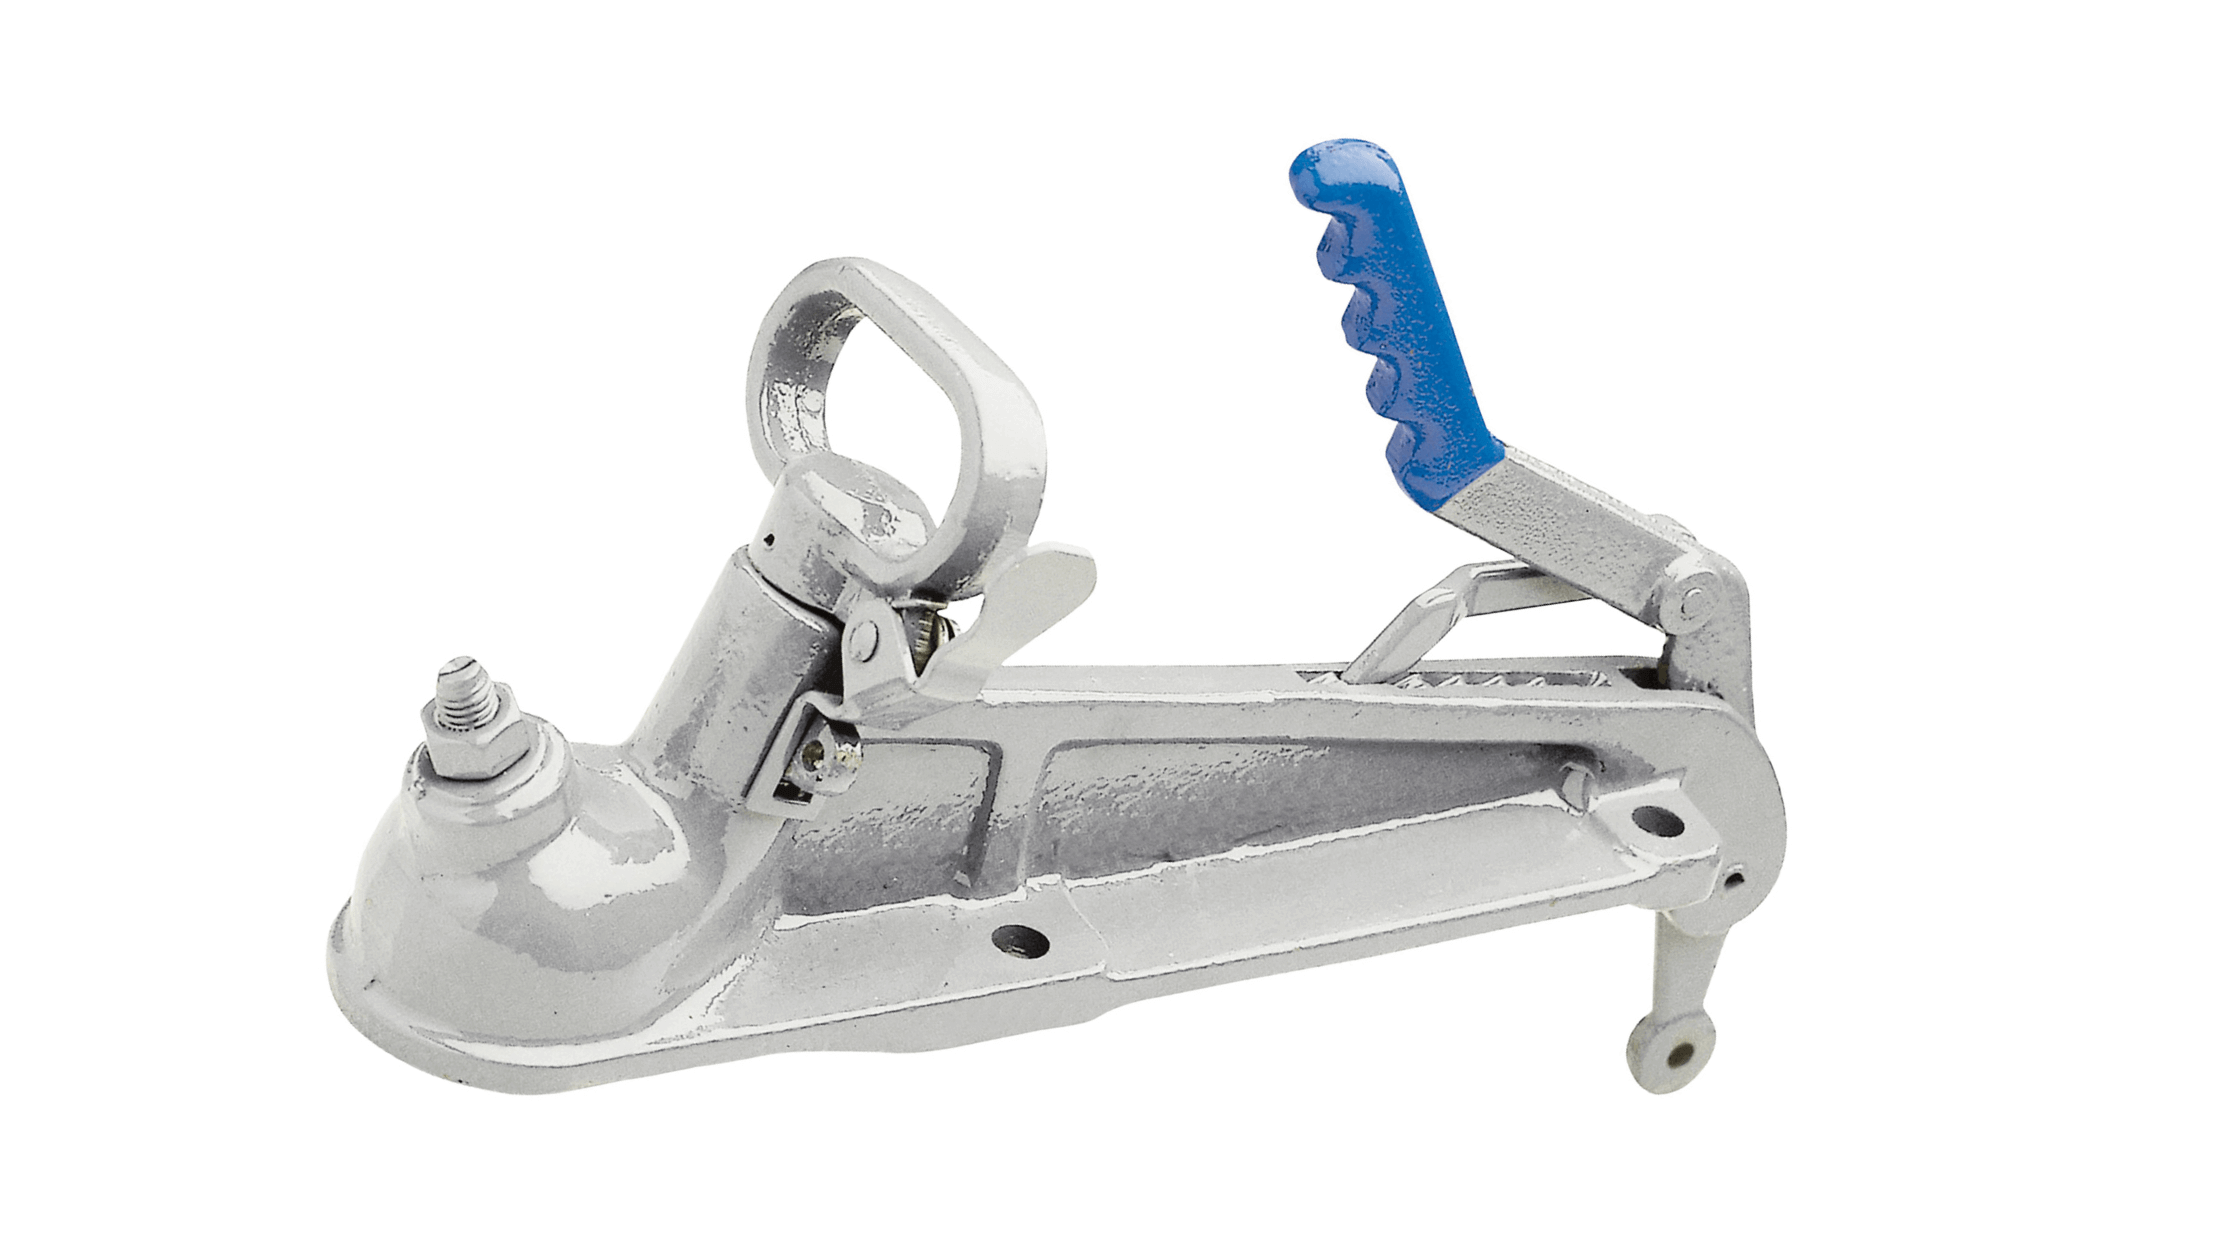
The second type of off-road coupling we’re going to look at, and our personal favourite, is the fully articulating 50mm ball hitch off-road coupling, such as Ark’s 3.5t XO Off-Road Coupling with Parkbrake. There are a number of benefits to this type of coupling. Firstly, unlike many off-road couplings, it works with your tow vehicle’s standard 50mm ball hitch. That means there’s no need to change the hitch on your tow vehicle. That makes things much easier if you’re towing an off-road caravan while you’re on holiday, but need to tow the little box trailer to the tip on the weekend! Secondly, the XO Off-Road Coupling offers full off-road articulation, so you’re getting all the benefits of something like the polyblock coupling but without the need to switch out the tow hitch on your tow vehicle.

Want to Know More About Trailer Couplings?

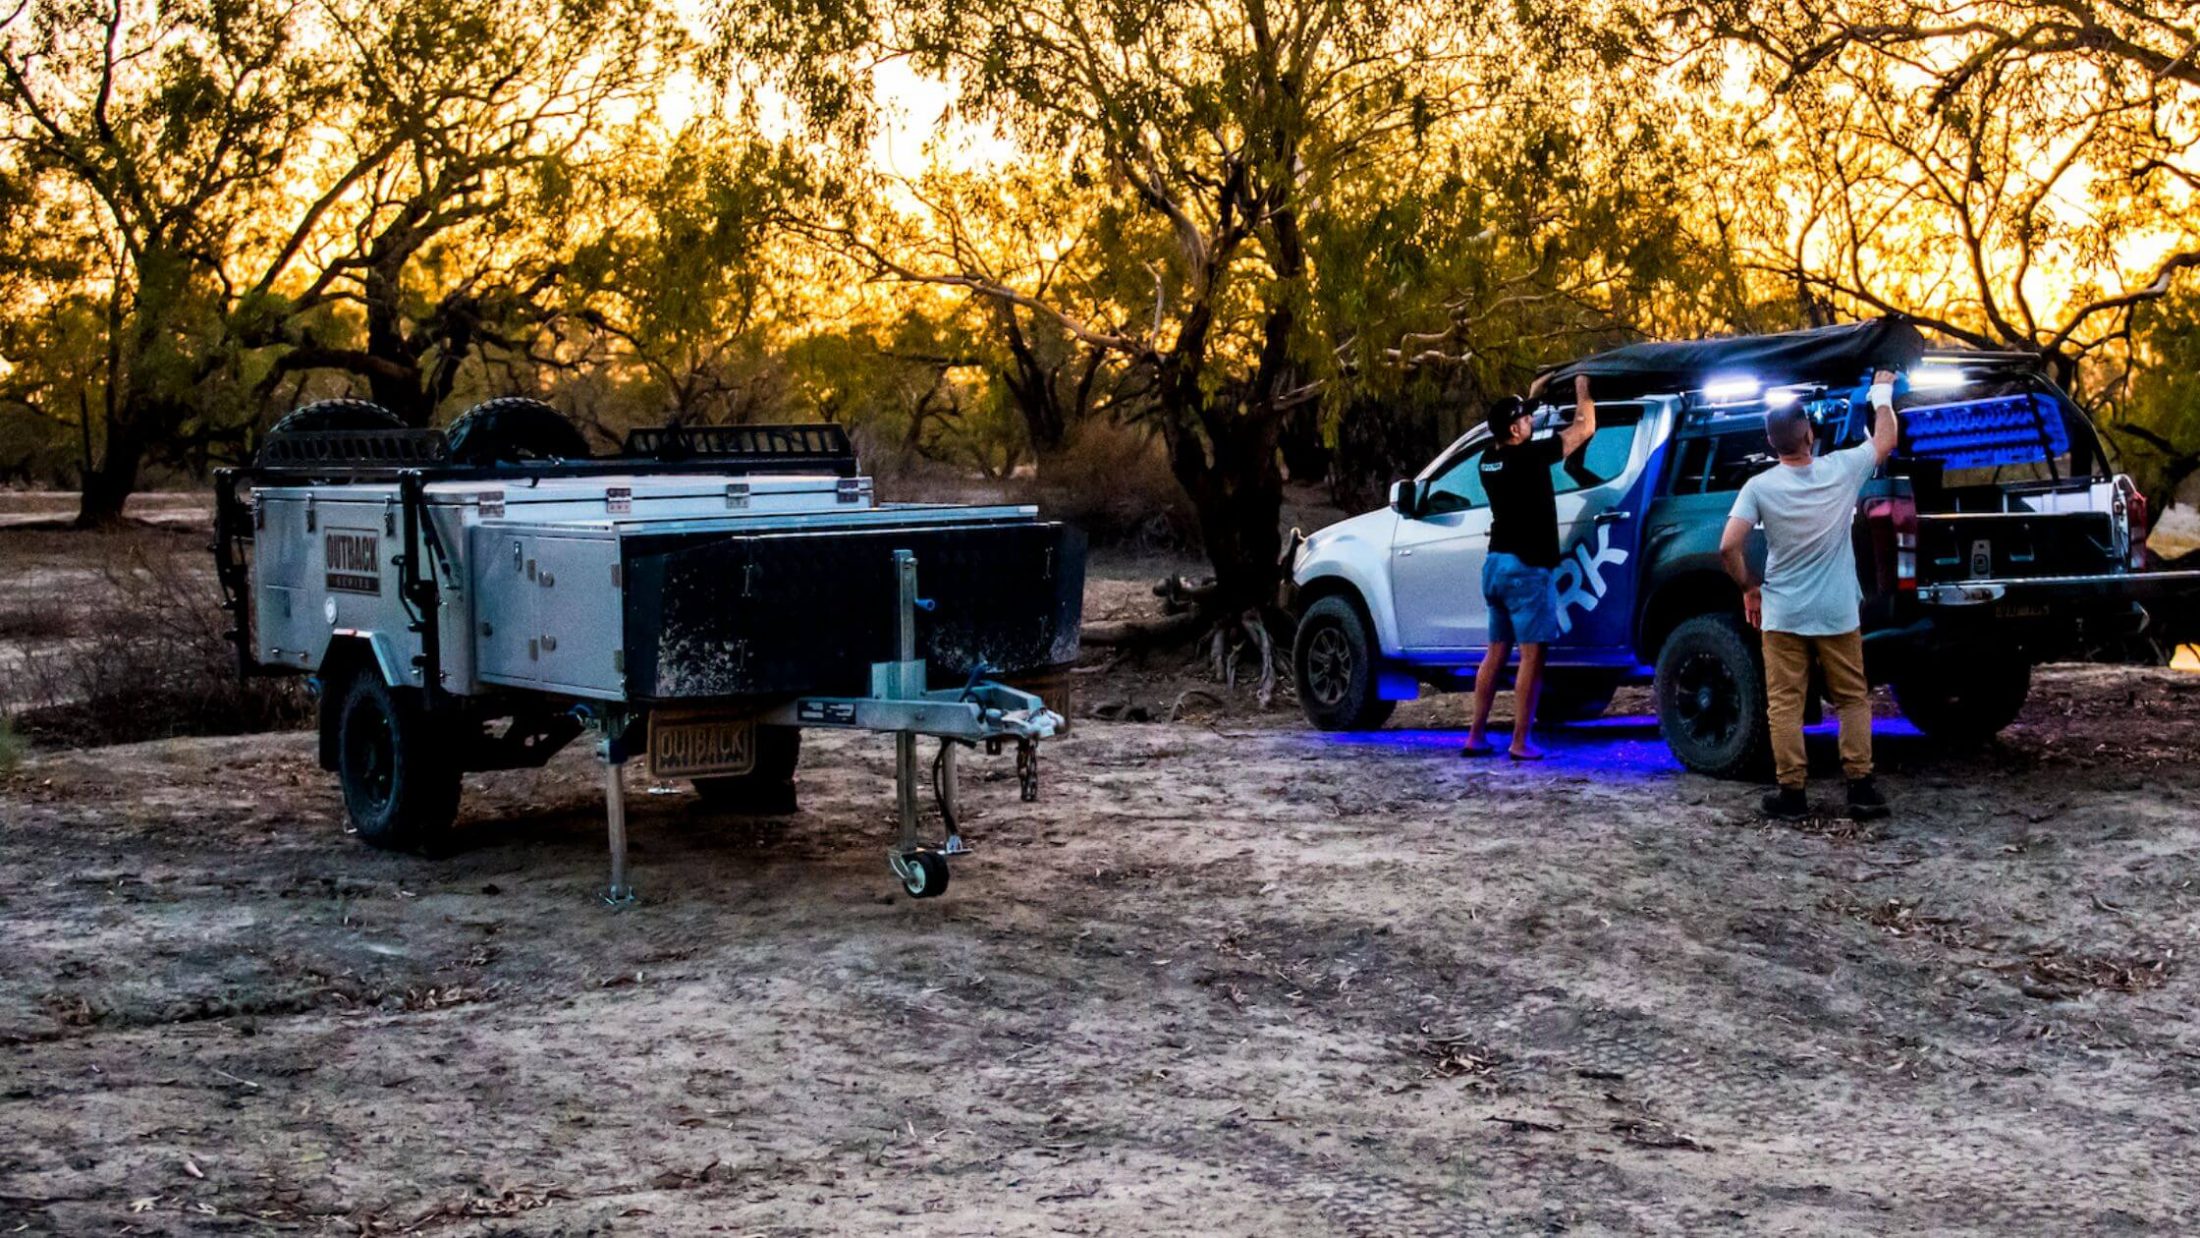
At Ark, we test all of our products, trailer couplings included in the greatest testing ground there’s ever been – the Aussie outdoors! We love nothing more than hitching up the camper trailer and hitting the tracks as soon as the clock hits 5pm on a Friday (Okay, you caught us out – 1pm!)

100% Aussie-owned and independent, ARK have been the leaders in trailer parts, towing gear and 4WD accessories for over 40 years. Whether it’s towing gear such as couplings and hitches or 12V power systems and battery packs to enhance your camping experience, the team at ARK have you covered. Get in touch with us today to learn how our expertise can help you get off-road more often!

on

Jockey wheels may just be the most under-appreciated component of any caravan or boat trailer. Your trailer’s jockey wheel is often one of the accessories you’ll rely on most. It stops your trailer from tipping or falling, helps you manoeuvre it into place above a tow ball and helps keep other components such as the hitch off the ground and in good condition while not being utilised.

Unfortunately, the jockey wheel is also one of the components most likely to be forgotten when it comes to maintenance. Well, we’re here to fix that! Because your jockey wheel cops a regular beating (especially on a boat trailer where it is regularly submerged in damaging salt water), we’re going to show you how to service it, replace damaged and worn parts as well as some maintenance you can perform to prevent wear and tear.

Campsite at sunset

The Tough Life of a Jockey Wheel

Depending on the type of trailer you tow, its jockey wheel can face a wide variety of conditions which can cause premature wear and tear. Let’s take a look at some of the more common stresses that various types of trailers can put on your jockey wheel.

Off-Road Caravans and Camper Trailers

An off-road specific jockey wheel such as ARK’s XO Series can cop an absolute beating when travelling off-road, especially when you consider the wide range of tough conditions Aussie 4WD subject their gear to on a regular basis. From being submerged in mud to copping hits from rocks and being coated in sand, an off-road jockey wheel lives possibly the hardest life of any jockey wheel!

Boat Trailers

Your boat trailer’s jockey wheel is regularly subjected to a specific condition that others rarely are – submersion in salt water. Of course, submerging a portion of your trailer when you off-load or collect your boat at the boat ramp is an unavoidable part of boating, so being proactive in preventing the damage that corrosive salt water can do to your jockey wheel is a must.

Car Trailers and other Heavy Load Trailers

If you tow a race car or heavy machinery then you can often be pushing your towing capacity to its absolute limit. While a car on its own often won’t take you close to the common 3500kg towing limits, it’s all the other things you may also need to load that will. Things like large toolboxes, extra tyres, extra engines, and heavy plant machinery, can all add up to some serious load. That means when your trailer isn’t hooked up to your tow vehicle, your jockey wheel can be doing a lot of heavy lifting and will require extra attention when it comes to maintenance. 

Removing Jockey Wheel For Servicing

Our 5-Step Guide To Jockey Wheel Maintenance

To make maintaining your jockey wheel easier, we’ve put together this handy 5-step guide to servicing and maintaining your jockey wheel!

1: Remove the Jockey Wheel

To make things easier for yourself, you’ll want to remove the jockey wheel from your trailer’s a-frame. Place wheel chocks and ensure the trailer’s handbrake is engaged, then place a jack stand or two under the a-frame to take the weight of the trailer. Wind the jockey wheel down until the trailer is being held by the jack stands, and remove the jockey wheel from the a-frame by unbolting it.

2: Disassemble and Inspect the Jockey Wheel

Most jockey wheel designs will require you to use a spanner at each side to loosen and remove the wheel from the lower casing. Once this is done, you’ll want to pull the wheel out and check it for any axle shaft wear, corrosion, or damage.

The lower and upper cases need to be separated. You can do this by fully winding the handle to extend the jockey wheel as far as possible until you release the worm drive shaft from its lock nut. Then, remove the handle by removing the roll pin with a punch.

Inspect all parts as you go for any wear or damage. ARK has a variety of replacement parts available should you need them.

3: Remove and Inspect the Bearing, then Reassemble the Upper Shaft

Next, you’ll need to use a plastic mallet to tap the worm drive shaft back into the housing, and completely remove the shaft. Remove the bearing and washer, clean them thoroughly, and check them for wear. If they look worn or damaged, it’s best to replace them.

Reassemble by placing the shaft back into the upper casing.

4: Clean and Check the Lower Shaft

Inspect the lower case to ensure the fixed nut is in good condition, is secure and there’s no damage to the thread. If needed, replace it with a new one. Apply fresh grease to the nut and the worm drive shaft.

Reassemble the lower shaft components and reconnect the upper and lower shafts.

5: Check The Solid Wheel and Reassemble

Apply fresh grease to the axle shaft and refit the solid wheel. Ensuring the wheel is free to rotate, re-tighten the axle nut. Inspect the roll pin for any wear or damage and replace it if necessary before refitting it into the handle.

Ensure the road wheel is free to swivel and rotates easily, and wind the handle in both directions to ensure it is operating properly. If everything is in order, you can refit the freshly serviced jockey wheel to your trailer!

Ark Testing at Sunset

Want to Know More About Jockey Wheels?

At Ark, we test all of our products, jockey wheels included in the greatest testing ground there’s ever been – the Aussie outdoors! We love nothing more than hitching up the camper trailer and hitting the tracks on the weekend, or hooking up the boat trailer and wetting a line.

100% Aussie-owned and independent, ARK have been the leaders in trailer parts, towing gear, and 4WD accessories for over 40 years. Whether it’s towing gear such as jockey wheels and hitches or 12V power systems and battery packs to enhance your camping experience, the team at ARK have you covered. Get in touch with us today to learn how our expertise can help you get off-road more often!

on

The wheel bearings on your trailer are some of the most important parts that require regular maintenance to ensure smooth towing. All too often you may see a trailer on the side of the road, missing a wheel, and posing a danger to its passengers and passers-by. Chances are these trailers’ owners have not kept on top of regular bearing checks and maintenance.

Simply put, well-greased and correctly fitted trailer wheel bearings are essential for a safe and easy towing experience. Dry, worn, or aged bearings that have excessive play in them are not just a danger to you and your passengers but can also be a hazard to other people on the road.

In this blog, we’ll cover the critical factors in wheel bearing replacement and maintenance. Our step-by-step guide will walk you through how to change wheel bearings on a trailer and the key elements to ensuring a safe and effective towing experience every time. Let’s dive in!

Regular Trailer Wheel Bearing Checks and Maintenance

Regular checks and maintenance are key to ensuring you don’t have any issues with your trailer’s wheel bearings. Periodic checks are the first step. Generally, you’ll want to check your bearings every six months or so, but we recommend taking a look before any longer trips or those on particularly rough terrain as well.

Importance of Routine Checks for Wheel Bearings

Your wheel bearings are the unsung heroes of your trailer’s suspension system, keeping things smooth and allowing you to conquer those rough trails. But they can’t do their job properly if they’re neglected or worn out. That’s why giving your wheel bearings some TLC deserves a top spot on your pre-adventure checklist.

Greasing Schedule: Maintaining Optimal Lubrication

Different trailers have different greasing requirements, so always double-check your trailer’s manual for the manufacturer’s recommendations. But as a rule of thumb, it’s good practice to give your wheel bearings a grease-up every 10,000 kilometres, or sooner if you’ve been hitting the dirt tracks hard.

A visual inspection can also determine whether your bearings will need to be regreased. If your visual inspection shows signs of overheating or wear, then you’ll definitely want to do a bit more investigating.

When it comes to greasing, don’t hold back! Use a high-quality, waterproof grease that can handle all the mud, water crossings, and rough terrain you’ll encounter on your off-road adventures. And make sure to clean the old grease off before applying the fresh stuff.

Signs of Wear: When to Address Wheel Bearing Issues

Now, let’s talk about the tell-tale signs that your wheel bearings might be crying out for attention. These trusty components won’t last forever, and ignoring the signs of wear can lead to costly repairs and even dangerous situations on the trails.

One of the most common signs of worn-out wheel bearings, and one that may call for a wheel bearing replacement, is a humming or growling noise coming from your trailer’s wheels. It can start off as a faint rumble, but if you hear it getting louder as you pick up speed, it’s time to give those bearings a thorough inspection.

Another red flag to watch out for is any excessive freeplay or looseness in your wheels. If you feel like your wheels have a bit too much wobble or shake, it’s a clear indication that something’s not right with your wheel bearings. The best way to check for freeplay in your bearings is to jack the wheel off the ground, hold it at the top and bottom corner, and move it back and forth. You’ll feel immediately if there is any freeplay. If there is, then it’s time to replace your bearings.

And of course, don’t overlook any visible damage, like rust, pitting, or loss of grease. These are all signs that your bearings are on the verge of giving up the ghost and need some attention pronto.

Selecting the Correct Wheel Bearings

If you’ve inspected your trailer wheel bearings and have determined that you need to replace them, you need to be careful to ensure you’re replacing them with the right ones.

Firstly, two elements of the bearing will need replacing: the cup and the cone. The cup is the part that is pressed into your trailer’s hub, whereas the cone is the component that contains the rollers of the bearing. You can identify what type of bearing your trailer needs by examining the old ones that you remove. They will have part numbers on both the bearing and on the cup.

If you’re unable to find a part number on the old bearing, then you can use measurements to determine the correct bearing. The two measurements you’ll require to find a suitable replacement bearing are the ID (internal diameter) and the OD (outer diameter), as well as the measurements of the seal.

Generally, there are two common types of bearings used in trailers in Australia: Holden and Ford, although with Holden closing down, this is bound to change in the future. You can easily find the correct replacement bearing for your trailer on our online shop, along with all the information you need to select the correct wheel bearing. Let’s take a closer look at them.

Bearing Specifications: Matching Size and Load Capacity

When it comes to bearing specifications, two critical factors to consider are size and load capacity. Ensuring you match these specifications to your trailer’s and 4WD’s requirements will keep you rolling smoothly on all your off-road escapades.

  • Size: Just like a well-fitted glove, the size of your wheel bearings should be a perfect match for your trailer. Too small, and they won’t provide the support and stability required for rough trails. Too large, and you’ll face unnecessary friction and potential damage. Consult your trailer’s manual or reach out to the experts at ARK to find the right size for your rig.
  • Load Capacity: Picture yourself loading up your trailer with all the camping gear, jerry cans, and recovery equipment you’ll need for a wild weekend in the bush. Your wheel bearings need to handle the weight. Check the load capacity specifications to ensure you’ve got bearings that can shoulder the load without breaking a sweat.

By matching the right size and load capacity, you’ll set yourself up for a smooth and carefree ride, no matter what challenging trails you encounter on your off-road journeys.

Quality Matters: Choosing Reliable Bearing Brands

Choosing reliable bearing brands can make all the difference between a thrilling adventure and a frustrating breakdown in the middle of nowhere.

At ARK, we know the ropes when it comes to providing top-notch trailer parts, and our selection of wheel bearings is no exception. Opting for a reputable brand like ARK ensures you’re investing in reliable, durable bearings built to withstand the toughest off-road conditions.

Remember, don’t cut corners when it comes to quality. Go for brands that have earned the trust and respect of the off-roading community. With ARK by your side, you’ll be set for countless thrilling journeys, knowing your wheel bearings can handle whatever challenges the outback throws your way.

Once you have the correct replacement parts, it’s time to get stuck into the wheel bearing replacement.

Trailer Bearings Wear With Use

Step by Step: How to Change Wheel Bearings on a Trailer

The process of replacing wheel bearings on a trailer can be a little tricky, and we only recommend you do it if you have a decent amount of mechanical knowledge. The tools that will be needed are:

  • Basic set of mechanical tools (i.e spanners, sockets, etc.)
  • Hammer
  • Punch
  • File
  • Sandpaper
  • Bench vice (preferable, though not essential)
  • Replacement parts

If you have everything you need and are ready to get stuck into it, then here’s our step-by-step DIY guide to wheel bearing replacement.

1. Remove the Hub Assembly

First up you’ll need to remove the dust cap, cotter pins, adjusting nut and washers. Be very careful when performing this step and ensure the outer bearing doesn’t fall out. Pull the hub towards you so the inner bearing and seal come out with the hub.

2. Remove the old Bearings from the Hub and Clean the Hub

This is where having a vice comes in very handy! Place the hub in your bench vice, and remove the outer bearing by lifting it out. Remove the inner bearing and seal using your hammer and punch, and then clean out the hub to remove all the old grease. Give it a clean with some brake cleaner or solvent, too.

3. Check the Spindle and Hub for Damage, and Apply some Grease

Carefully check the spindle for a damaged thread or any scoring or damage. If there’s any damage present, you may need to consider replacing the part. If the part looks in adequate condition, then apply a light coating of grease to the spindle. Check the hub bore and cub backing for any nicks and burrs, and remove any if found.

4. Prepare the New Bearings

Remove the new bearings from the packaging and pack them with grease by forcing grease under the cage between the rollers, beginning from the larger side until you see grease on the smaller side. You’ll also want to fill the hub with grease to the inside diameter of the outer bearing.

5. Fit the Bearings into the Hub

Again, using a bench vice if you have one, install the inner bearing and the seal into the hub. TOP TIP: Double-check that the bearing is placed the correct way! This is a common mistake. Then you’ll want to install the outer bearing into the hub.

6. Reinstall the Hub to your Trailer

Being careful not to damage the seal against the end of the spindle, slide the hub onto the spindle. This is where you’ll be glad to have greased the spindle first.

7. Adjust the Bearing for Proper Clearance

Tighten up the adjusting nut and then back it off a couple of turns. This will apply preload to the bearing before the final adjustment. Using a 12” wrench for final adjustment, turn until the hub binds – you’ll then know that it’s all been properly seated. Back the nut off a quarter of a turn and then lock it in place with the new cotter pin.

8. Replace the Cap and Wheel Securely

Tap the cap onto the hub with a hammer until it is solidly seated against the hub. Reinstall the wheel.

9. Perform a Test Run and Recheck the Hub

Hook the trailer up to your tow vehicle and take it for a short test drive, being careful to feel for anything unusual. Once you have completed the test drive, double-check the trailer’s wheels for any freeplay or signs of overheating. If everything is smooth sailing, then you’re all done with your wheel bearing replacement!

Ark Traile and Camping specialists

Keep your Trailer up to Scratch with ARK

At ARK, we’ve been leaders in trailer parts, towing gear and 4WD accessories for over 40 years, and are 100% Australian owned and independent. You can be sure that when you buy a product from Ark, you’re getting something that has been properly tried and tested in real Aussie conditions!

Keep Your Trailer Bearings up to Scratch with ARK

At ARK, we’ve been leaders in trailer parts, towing gear, and 4WD accessories for over 40 years, and are 100% Australian-owned and independent. You can be sure that when you buy a product from us, you’re getting something that has been properly tried and tested in real Aussie conditions! 

Changing a trailer wheel bearing as we’ve outlined above may be required if you notice extensive wear and tear. If you need a hand with wheel bearing replacement or trailer bearing care, don’t hesitate to reach out to our friendly team for expert advice and guidance.

Future Maintenance: Planning Your Next Inspection

Staying ahead of any potential problems with routine inspections and preventative maintenance can save you from costly repairs and breakdowns on the road.

Here are some tips to help you plan for your next inspection:

  • Set a reminder schedule: Whether it’s a physical calendar, digital reminder, or a note on your phone, make sure to set a schedule for regular inspections and greasing.
  • Keep a record: Keep track of your maintenance history and note any signs of wear or issues that need attention. This record can help you stay ahead of any potential problems and make informed decisions about future maintenance needs.
  • Stay up to date on manufacturer recommendations: Make sure to stay informed on any updates or changes to your manufacturer’s recommended maintenance schedule or procedures.

By planning ahead, keeping records, and staying informed, you can ensure your trailer wheel bearings are prepared for all your upcoming adventures.

Expert Assistance: When to Seek Professional Help

Even with all the preventative maintenance in the world, there may come a time when you need expert assistance with your trailer bearings. Ignoring a problem can lead to further damage or even put your safety at risk. So, how do you know when it’s time to seek professional help?

  • Unusual noises or vibrations: If your trailer is making unusual noises or vibrations that you can’t attribute to anything else, it’s time to get it checked out.
  • Clear signs of wear or damage: Any visible signs of wear, cracks, or leaks should be addressed promptly to prevent further damage.
  • Lack of experience or tools: If you’re not confident in your ability to inspect or maintain your trailer bearings, it’s best to leave it to the experts who have the experience and tools required.

Need some more gadgets to finish your setup? Check out our full range of high-quality trailer parts to ensure you’re riding with the best in the biz. Happy off-roading!

At ARK, we’ve been leaders in trailer parts, towing gear and 4WD accessories for over 40 years, and are 100% Australian owned and independent. You can be sure that when you buy a product from Ark, you’re getting something that has been properly tried and tested in real Aussie conditions!

on

Launching and retrieving a boat can be tricky at the best of times, especially in adverse weather or water conditions. This is doubly true if you’re launching a boat solo. The thing is though, any true fisherman will know that sometimes flying solo is the best option!

It’s possible, with the right gear, to launch practically any boat solo if you’ve prepared properly. Of course, the smaller your boat is, the easier it will be to launch. In years past, trial and error and LOTS of practice was the only way to become a pro at launching and retrieving your boat solo. These days, we’re lucky… there’s some neat kit out there that has been specifically designed to assist you in your boat launch and retrieval, namely, the Ezi-Guide Boat Retrieval System.

Ark Eziguide boat loading system

What is the Ezi-Guide Boat Retrieval System?

In a nutshell, Ezi-Guide Boat Retrieval is a self-aligning boat loading and launching system which can be used in launching your boat and either winch-assisted or drive-assisted retrievals and will always guide your boat safely to the centre of your trailer. The system allows you to launch and load your boat solo, and assists in avoiding to load your boat off the rollers which can damage your boat and your trailer. They also mitigate the need to have a spotter ensuring that you align the boat with the trailer perfectly, and can also make loading in adverse conditions such as wind and strong currents a lot easier.

Installing Ezi-Guide

Exi-Guide features an easy-to-install U-Bolt Ezi-Mount mounting system, which means there’s no power tools or drilling required. In fact, all you need to install Ezi-Guide is a 19mm socket or spanner and a marking pen. The Ezi-Guide boat loader suits trailers with both 50mm and 75mm cross members. For detailed installation instructions, have a read of the step-by-step installation guide here.

Experience the freedom of solo boating

ARK’S Step-By-Step Guide to Launching your Boat Solo (With Ezi-Guide!)

So you’ve got your boat on the trailer, ready to head out on the weekend, and you get a call from your mate at the last moment – the missus is crook, and he can’t make it. Better cancel the trip, right? Wrong! If you have an Ezi-Guide, then launching your boat solo is very achievable… and we’re going to show you just how achievable! How to launch a boat solo is as easy as following this step-by-step guide, which’ll have you hitting the water solo in no time!

Take the Cautious Approach

It might go without saying, but without someone there to spot any problems that may arise while you launch your boat, you’ll need to be extra vigilant in ensuring you get everything right. You’ll want to assess the conditions of the ramp so you know what to be wary of, whether it’s a strong current or hidden debris.

Remove Tie Downs and Place Bungs

Double check that all tie-down straps have been removed, and remember your bungs. The last thing you want is to have forgotten a strap, or to start taking on water because a bung hasn’t been replaced.

Lineup Your Boat on the Ramp

Reverse your trailer and boat down the ramp, being extra cautious as to your surroundings. It’s important to only reverse your trailer into the water to the point that the last keel roller is level with the water. Any deeper, and the Ezi-Guide system won’t be as effective. Once you’ve reversed to the unload point, you’ll need to hop out and (possibly) get your feet wet!

Unclip Cautiously

Once the boat and trailer is in position, you’ll want to unclip everything, including the safety. During this step it’s important to be wary of how your boat is going to react, especially if the ramp is a steep one. Some trailers with a lot of rollers will mean your boat will want to slide, so be ready for anything.

Board your boat and check your surrounds

Hop on board your boat, and check down behind it prior to starting the engine. You’ll want to be extra cautious for swimmers, or debris or anything that may cause problems.

Trim Your Engine

Trim your engine down, but be cautious of going too far. Remembering that the water is most likely very shallow here, if you happen to trim your engine too far down you risk hitting the bottom and causing damage.

Reverse off

Start the engine, and hit reverse. The trick here is to not give it too much power. You want to give it just enough revs for the boat to begin sliding off the rollers.

Guided by Ezi-Guide

The beauty of having Ezi-Guide installed is that you don’t have to worry about the angle or any slippage – Ezi-Guide will do that for you. Simply hit reverse and let Ezi-Guide do its thing, and before you know it you’ll be in the water!

Tie off the Boat and Park Your Trailer

Now the boat is in the water, you’ll want to tie it off at the dock, head back to the ramp and park your trailer and tow vehicle so the tramp is clear for the next user.

Hit the Water!

And with that, you’ve successfully launched your boat solo! It’s time to hit the water.

Ark The Towing & Camping Specialists

Where to go for more information?

When it comes to hitting the water in your boat, ARK are the proven experts. They’ve been leaders in trailer parts, towing gear and 4WD accessories for over 40 years, are 100% Australian owned and independent.

The best part? They love to hit the water just like you! A typical weekend for Ark members includes getting the boat out and wetting a line, as well as tackling some of the more remote boating spots around the country. So you can be sure that when you buy a product from Ark, you’re getting something that has been properly tried and tested in real Aussie conditions!